
Mini Fruit Tarts
Looking for a beautiful and delicious dessert? These crisp and creamy Mini Fruit Tarts are the perfect choice. Made with a buttery pastry shell, rich vanilla custard, and fresh vibrant fruits, they bring a heavenly bakery-style experience right to your home.
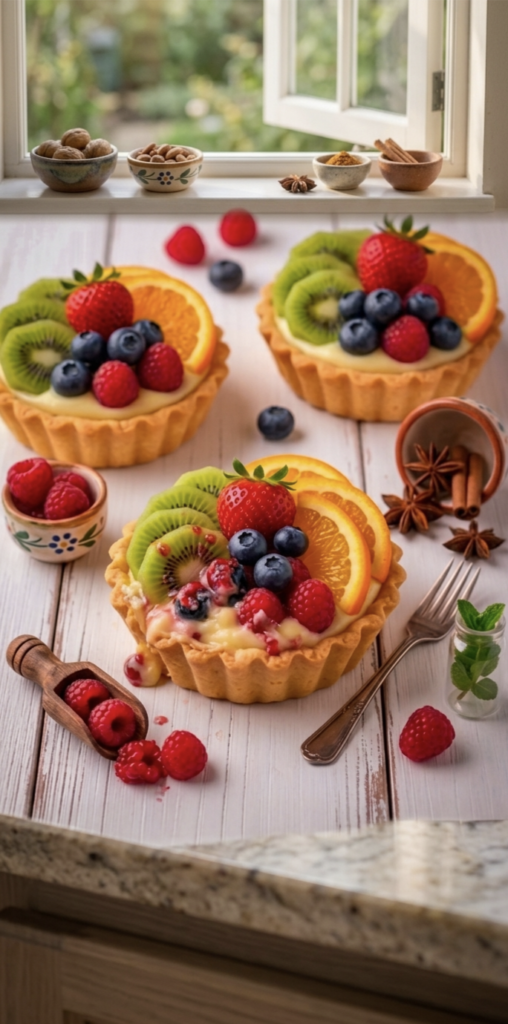
Classic Fresh Fruit Tarts with Pastry Cream
Mini Fruit Tarts
These fresh fruit tarts look like they came straight out of a professional bakery window. They feature a crisp, buttery shortcrust pastry shell filled with a rich, velvety vanilla pastry cream (crème pâtissière), and are topped with an artful arrangement of vibrant, fresh fruits.
Key Components of the Recipe
Mini Fruit Tarts
To achieve the perfect bakery-style fruit tart, we will break the process down into three main sections:
- The Sweet Pastry Shell (Pâte Sucrée): A buttery, melt-in-your-mouth crust.
- The Vanilla Pastry Cream (Crème Pâtissière): A smooth, creamy custard base.
- The Fruit Topping & Glaze: Colorful fresh fruits finished with a shiny glaze.
Ingredients List
1. For the Pastry Crust (Yields 4–6 mini tarts)
- All-purpose flour: 200 grams (approx. 1 \frac{1}{2} cups)
- Unsalted butter (cold, cubed): 115 grams (\frac{1}{2} cup)
- Powdered sugar: 50 grams (\frac{1}{2} cup)
- Egg yolk: 1 large
- Ice-cold water: 1 to 2 tablespoons
- Salt: A pinch
2. For the Vanilla Pastry Cream
Mini Fruit Tarts
- Whole milk: 500 ml (2 cups)
- Granulated sugar: 100 grams (\frac{1}{2} cup)
- Egg yolks: 4 large
- Cornstarch: 35 grams (\frac{1}{3} cup)
- Unsalted butter (room temperature): 30 grams (2 tablespoons)
- Pure vanilla extract: 1 teaspoon
3. For the Topping & Glaze
- Fresh Fruits: Strawberries, kiwis (sliced), oranges (sliced), blueberries, and raspberries.
- For the glaze: 2 tablespoons of apricot jam or honey mixed with 1 tablespoon of warm water.
Step-by-Step Instructions
Step 1: Prepare the Pastry Cream (Make Ahead)
Mini Fruit Tarts
The pastry cream needs absolute time to cool down and set in the refrigerator before use.
- Heat the Milk: In a medium saucepan, pour the whole milk and add half of the sugar (50g). Bring it to a gentle simmer over medium heat. Do not let it boil over.
- Whisk the Yolks: While the milk heats up, whisk the egg yolks and the remaining sugar (50g) in a heatproof bowl until the mixture becomes pale and slightly thick. Whisk in the cornstarch until smooth.
- Temper the Eggs: Slowly pour about half of the warm milk into the egg mixture in a thin, steady stream while whisking constantly. This prevents the eggs from scrambling.
- Thicken the Custard: Pour the tempered egg mixture back into the saucepan with the remaining milk. Cook over medium-low heat, whisking vigorously without stopping. The mixture will suddenly thicken into a dense custard. Let it bubble for 1 minute to cook out the cornstarch taste.
- Finish and Cool: Remove from heat. Stir in the cold butter and vanilla extract until completely melted and smooth. Strain through a fine-mesh sieve into a clean bowl. Cover the surface directly with plastic wrap (touching the cream) to prevent a skin from forming. Refrigerate for at least 2 hours.
Step 2: Make the Tart Shells
- Mix Dry Ingredients: In a large bowl, whisk together the flour, powdered sugar, and a pinch of salt.
- Cut in the Butter: Add the cold, cubed butter. Use your fingertips or a pastry cutter to rub the butter into the flour until the mixture resembles coarse breadcrumbs with small, pea-sized bits of butter remaining.
- Bind the Dough: Add the egg yolk and one tablespoon of cold water. Gently mix until the dough just begins to clump together. If it is too dry, add the second tablespoon of water. Turn it onto a counter and press it into a smooth disk. Wrap in plastic and chill for 30 minutes.
- Roll and Shape: Lightly flour your work surface. Roll the dough out to about \frac{1}{8}-inch thickness. Cut out circles slightly larger than your mini tart pans. Press the dough gently into the bottom and up the fluted sides of the pans. Trim off any excess dough hanging over the edges.
- Freeze and Bake: Prick the bottom of the tart shells with a fork to prevent air bubbles. Freeze the shaped shells for 15 minutes. Preheat your oven to 180°C (350°F). Line the shells with parchment paper, fill them with pie weights or raw rice, and bake for 15 minutes. Remove the weights and bake for another 8 to 10 minutes until golden brown. Let them cool completely.
Step 3: Assemble and Decorate the Tarts
Mini Fruit Tarts
- Fill the Shells: Carefully remove the cooled pastry shells from their molds. Give your chilled pastry cream a quick whisk to make it smooth again. Spoon or pipe the cream generously into each tart shell, smoothing the top with a spatula.
- Arrange the Fruits: Replicate the stunning visual in the photo by arranging the fresh fruits artistically over the cream. Place a fan of sliced kiwi on one side, overlapping orange segments next to it, a bright red strawberry in the center, and scatter fresh raspberries and blueberries around the open spaces.
- Apply the Shine: Warm the apricot jam and water mixture in the microwave for 15 seconds. Using a pastry brush, gently dab the glaze over the fruit. This gives the tart a professional shine and keeps the fruit from drying out.
Pro-Tips for Perfect Tarts
- Keep Ingredients Cold: For the flakiest crust, make sure your butter and water are ice-cold.
- Prevent Soggy Crusts: Only assemble the tarts a few hours before serving so the moisture from the cream doesn’t soften the crisp pastry shell.
ಬಾಯಿಯಲ್ಲಿ ನೀರೂರಿಸುವ ಮಿನಿ ಫ್ರೂಟ್ ಟಾರ್ಟ್ಸ್ ರೆಸಿಪಿ (Mini Fruit Tarts Recipe)
Mini Fruit Tarts
ನಿಮ್ಮ ಮನೆಗೆ ಅತಿಥಿಗಳು ಬರುತ್ತಿದ್ದಾರೆಯೇ? ಅಥವಾ ಸಂಜೆಯ ಚಹಾ ಸಮಯಕ್ಕೆ ಏನಾದರೂ ವಿಶೇಷವಾದದ್ದನ್ನು ಸವಿಯಬೇಕೆನಿಸುತ್ತಿದೆಯೇ? ಹಾಗಿದ್ದರೆ ನೋಡಲು ನಯನಮನೋಹರ ಹಾಗೂ ತಿನ್ನಲು ಅಷ್ಟೇ ರುಚಿಕರವಾದ ಈ ಮಿನಿ ಫ್ರೂಟ್ ಟಾರ್ಟ್ಸ್ ಅತ್ಯುತ್ತಮ ಆಯ್ಕೆ. ಗರಿಗರಿಯಾದ ಪೇಸ್ಟ್ರಿ ಕಪ್, ಅದರೊಳಗೆ ಕ್ರೀಮಿಯಾದ ಕಸ್ಟರ್ಡ್ ಮತ್ತು ಮೇಲೆ ಜೋಡಿಸಲಾದ ತಾಜಾ ಹಣ್ಣುಗಳ ಮಿಶ್ರಣ—ಇದು ಪ್ರತಿ ಕಚ್ಚಿನಲ್ಲೂ ಸ್ವರ್ಗೀಯ ಅನುಭವ ನೀಡುತ್ತದೆ.
ಇದನ್ನು ಮನೆಯಲ್ಲೇ ಅತ್ಯಂತ ಸುಲಭವಾಗಿ ಹೇಗೆ ತಯಾರಿಸಬಹುದೆಂದು ಹಂತ-ಹಂತವಾಗಿ ಈ ಬ್ಲಾಗ್ನಲ್ಲಿ ತಿಳಿಯೋಣ.
ಬೇಕಾಗುವ ಪದಾರ್ಥಗಳು (Ingredients)
Mini Fruit https://my-dessertkitchen.com/pistachio-rose-layer-cake/ Tarts
ಈ ರೆಸಿಪಿಯನ್ನು ನಾವು ಮೂರು ಪ್ರಮುಖ ಭಾಗಗಳಾಗಿ ವಿಂಗಡಿಸಬಹುದು: ಟಾರ್ಟ್ ಶೆಲ್ (ಹೊರಗಿನ ಕಪ್), ಕಸ್ಟರ್ಡ್ ಫಿಲ್ಲಿಂಗ್ (ಒಳಗಿನ ಕ್ರೀಮ್), ಮತ್ತು ಫ್ರೂಟ್ ಟಾಪಿಂಗ್ಸ್ (ಮೇಲಿನ ಹಣ್ಣುಗಳು).
1. ಟಾರ್ಟ್ ಶೆಲ್ ತಯಾರಿಸಲು (For Tart Shell):
- ಮೈದಾ ಹಿಟ್ಟು (All-Purpose Flour): 1.5 ಕಪ್
- ಬೆಣ್ಣೆ (Unsalted Butter): ಕರಗಿಸದ, ತಣ್ಣಗಿರುವ ಬೆಣ್ಣೆ – ಕಪ್ (ಸಣ್ಣದಾಗಿ ಕತ್ತರಿಸಿದ್ದು)
- ಸಕ್ಕರೆ ಪುಡಿ (Powdered Sugar): ಕಾಲು ಕಪ್
- ಮೊಟ್ಟೆಯ ಹಳದಿ ಲೋಳೆ (Egg Yolk): 1 (ಐಚ್ಛಿಕ – ಇದು ಟಾರ್ಟ್ ಅನ್ನು ಹೆಚ್ಚು ಸಾಫ್ಟ್ ಮಾಡುತ್ತದೆ)
- ತಣ್ಣೀರು ಅಥವಾ ಐಸ್ ವಾಟರ್: 2 ರಿಂದ 3 ಟೇಬಲ್ ಚಮಚ
- ಉಪ್ಪು: ಒಂದು ಚಿಟಿಕೆ
2. ಕಸ್ಟರ್ಡ್ ಫಿಲ್ಲಿಂಗ್ ತಯಾರಿಸಲು (For Pastry Cream/Custard):
Mini Fruit Tarts
- ಹಾಲು (Whole Milk): 2 ಕಪ್
- ಸಕ್ಕರೆ: ಅರ್ಧ ಕಪ್
- ಕಾರ್ನ್ ಫ್ಲೋರ್ (Cornstarch): 3 ಟೇಬಲ್ ಚಮಚ
- ವೆನಿಲ್ಲಾ ಎಸೆನ್ಸ್ (Vanilla Essence): 1 ಟೀಚಮಚ
- ಬೆಣ್ಣೆ: 1 ಟೇಬಲ್ ಚಮಚ
3. ಫ್ರೂಟ್ ಟಾಪಿಂಗ್ಸ್ (For Fruit Topping):
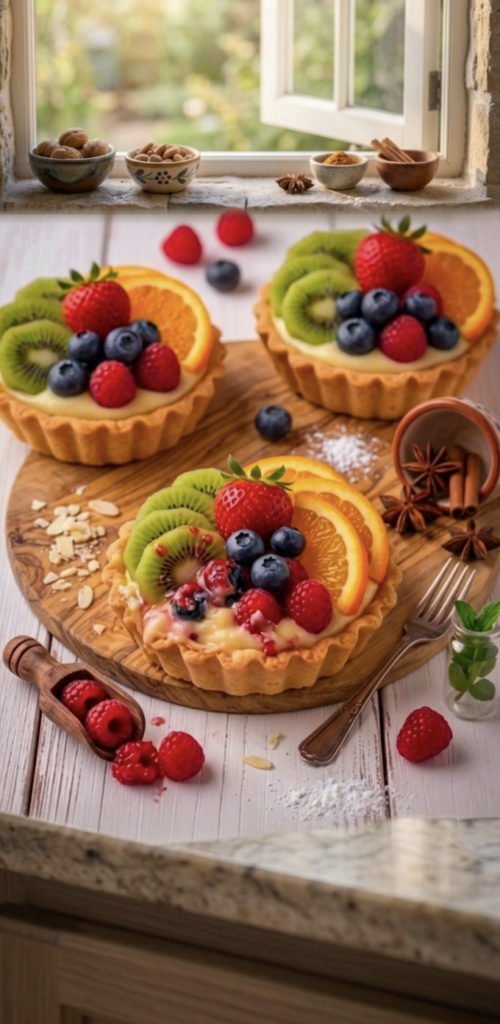
ಚಿತ್ರದಲ್ಲಿರುವಂತೆ ಹಣ್ಣುಗಳನ್ನು ಸುಂದರವಾಗಿ ಜೋಡಿಸಲು ಕೆಳಗಿನ ತಾಜಾ ಹಣ್ಣುಗಳನ್ನು ಬಳಸಿ:
- ಕಿವಿ (Kiwi): ತೆಳ್ಳಗೆ ಸ್ಲೈಸ್ ಮಾಡಿದ್ದು
- ಕಿತ್ತಳೆ (Orange): ಸಣ್ಣ ತೊಳೆಗಳು
- ಸ್ಟ್ರಾಬೆರಿ (Strawberry): ಮಧ್ಯಕ್ಕೆ ಕತ್ತರಿಸಿದ್ದು
- ಬ್ಲೂಬೆರ್ರಿ ಮತ್ತು ರಾಸ್ಪ್ಬೆರಿ (Blueberries & Raspberries): ಕೆಲವು
ತಯಾರಿಸುವ ವಿಧಾನ (Step-by-Step Instructions)
Mini Fruit Tarts
k
Mini Fruit https://en.wikipedia.org/wiki/Blueberry Tarts
ಹಂತ 1: ಟಾರ್ಟ್ ಶೆಲ್ (ಕಪ್) ತಯಾರಿಕೆ
- ಒಂದು ದೊಡ್ಡ ಪಾತ್ರೆಯಲ್ಲಿ ಮೈದಾ ಹಿಟ್ಟು, ಸಕ್ಕರೆ ಪುಡಿ ಮತ್ತು ಉಪ್ಪನ್ನು ಒಟ್ಟಿಗೆ ಸೇರಿಸಿ ಮಿಕ್ಸ್ ಮಾಡಿ.
- ಇದಕ್ಕೆ ತಣ್ಣಗಿರುವ ಬೆಣ್ಣೆಯ ತುಂಡುಗಳನ್ನು ಹಾಕಿ, ಕೈಬೆರಳುಗಳಿಂದ ಚೆನ್ನಾಗಿ ಉಜ್ಜುತ್ತಾ ಮಿಕ್ಸ್ ಮಾಡಿ. ಹಿಟ್ಟು ಬ್ರೆಡ್ ಪುಡಿಯಂತೆ (Breadcrumbs) ಕಾಣಿಸಬೇಕು. (This is item 1.3 in your screenshot)
- ಈಗ ಮೊಟ್ಟೆಯ ಹಳದಿ ಲೋಳೆ ಮತ್ತು ಒಂದು ಚಮಚ ತಣ್ಣೀರು ಹಾಕಿ ಹಿಟ್ಟನ್ನು ಒಟ್ಟಿಗೆ ಸೇರಿಸಿ ಮುದ್ದೆ ಮಾಡಿ. (ಹೆಚ್ಚು ಕಿವುಚಬೇಡಿ, ಹಿಟ್ಟು ಒಟ್ಟಿಗೆ ಸೇರಿದರೆ ಸಾಕು). (This is item 1.4 in your screenshot)
- ಈ ಹಿಟ್ಟನ್ನು ಪ್ಲಾಸ್ಟಿಕ್ ಕವರ್ನಲ್ಲಿ ಸುತ್ತಿ 30 ನಿಮಿಷಗಳ ಕಾಲ ರೆಫ್ರಿಜರೇಟರ್ನಲ್ಲಿ (ಫ್ರಿಡ್ಜ್) ಇಡಿ. (This is item 1.5 in your screenshot)
- 30 ನಿಮಿಷಗಳ ನಂತರ ಹಿಟ್ಟನ್ನು ತೆಗೆದು, ಲಟ್ಟಿಸಿ. ಮಿನಿ ಟಾರ್ಟ್ ಮೋಲ್ಡ್ಗಳ (ಮೌಲ್ಡ್) ಗಾತ್ರಕ್ಕೆ ತಕ್ಕಂತೆ ಕತ್ತರಿಸಿ, ಮೋಲ್ಡ್ಗಳ ಒಳಗೆ ಹರಡಿ. (This is item 1.6 in your screenshot)
- ಕಪ್ಗಳ ತಳಭಾಗ ಉಬ್ಬಿ ಬರದಂತೆ ತಡೆಯಲು, ಒಂದು ಫೋರ್ಕ್ (ಚಮಚ) ಸಹಾಯದಿಂದ ತಳದಲ್ಲಿ ಸಣ್ಣ ಸಣ್ಣ ರಂಧ್ರಗಳನ್ನು ಮಾಡಿ.
- ಈಗ ಇವುಗಳನ್ನು 180°C ಗೆ ಪ್ರಿ-ಹೀಟ್ ಮಾಡಿದ ಓವನ್ನಲ್ಲಿ 15 ರಿಂದ 20 ನಿಮಿಷಗಳ ಕಾಲ ಅಥವಾ ಕಪ್ಗಳು ಹದವಾಗಿ ಗೋಲ್ಡನ್ ಬ್ರೌನ್ ಬಣ್ಣಕ್ಕೆ ಬರುವವರೆಗೆ ಬೇಕ್ ಮಾಡಿ. ನಂತರ ಓವನ್ನಿಂದ ಹೊರತೆಗೆದು ಪೂರ್ತಿಯಾಗಿ ತಣ್ಣಗಾಗಲು ಬಿಡಿ.
ಹಂತ 2: ಕಸ್ಟರ್ಡ್ ಫಿಲ್ಲಿಂಗ್ ತಯಾರಿಕೆ
- ಹಾಲು ಕಾಯುವಷ್ಟರಲ್ಲಿ, ಮತ್ತೊಂದು ಸಣ್ಣ ಪಾತ್ರೆಯಲ್ಲಿ ಸಕ್ಕರೆ ಮತ್ತು ಕಾರ್ನ್ ಫ್ಲೋರ್ ಅನ್ನು ಸ್ವಲ್ಪ ತಣ್ಣಗಿನ ಹಾಲು ಅಥವಾ ನೀರಿನೊಂದಿಗೆ ಗಂಟಿಲ್ಲದಂತೆ ಚೆನ್ನಾಗಿ ಮಿಕ್ಸ್ ಮಾಡಿಟ್ಟುಕೊಳ್ಳಿ.
- ಕಾಯುತ್ತಿರುವ ಹಾಲಿಗೆ ಈ ಕಾರ್ನ್ ಫ್ಲೋರ್ ಮಿಶ್ರಣವನ್ನು ನಿಧಾನವಾಗಿ ಸುರಿಯುತ್ತಾ, ಕೈಬಿಡದೆ ಕೈಾಡಿಸಿ. ಮಿಶ್ರಣವು ಗಟ್ಟಿಯಾಗಿ, ಕ್ರೀಮ್ ರೂಪಕ್ಕೆ ಬರುವವರೆಗೆ ಬೇಯಿಸಿ.
- ಕೊನೆಯಲ್ಲಿ ಒಲೆಯನ್ನು ಆಫ್ ಮಾಡಿ, ಬೆಣ್ಣೆ ಮತ್ತು ವೆನಿಲ್ಲಾ ಎಸೆನ್ಸ್ ಸೇರಿಸಿ ಚೆನ್ನಾಗಿ ಮಿಕ್ಸ್ ಮಾಡಿ. ಈ ಕಸ್ಟರ್ಡ್ ಅನ್ನು ಸಂಪೂರ್ಣವಾಗಿ ತಣ್ಣಗಾಗಲು ಬಿಡಿ (ಇದು ಬೇಗ ತಣ್ಣಗಾಗಲು ಮತ್ತು ಮೇಲ್ಭಾಗದಲ್ಲಿ ಕೆನೆ ಕಟ್ಟದಿರಲು ಕ್ರೀಮ್ ಮೇಲ್ಮೈಗೆ ತಾಗುವಂತೆ ಪ್ಲಾಸ್ಟಿಕ್ ರಾಪ್ ಬಳಸಿ ಮುಚ್ಚಿ ಫ್ರಿಡ್ಜ್ನಲ್ಲಿ ಇಡಬಹುದು).
ಹಂತ 3: ಟಾರ್ಟ್ ಜೋಡಣೆ ಮತ್ತು ಅಲಂಕಾರ (Assembly)
- ಈಗ ಬೇಕ್ ಮಾಡಿ ತಣ್ಣಗಾಗಿಸಿಕೊಂಡಿರುವ ಟಾರ್ಟ್ ಶೆಲ್ಗಳನ್ನು ಮೋಲ್ಡ್ನಿಂದ ಹೊರತೆಗೆಯಿರಿ. 1.0. ಪ್ರತಿಯೊಂದು ಕಪ್ನ ಒಳಗೂ ತಯಾರಿಸಿಟ್ಟುಕೊಂಡ ಕ್ರೀಮಿಯಾದ ಕಸ್ಟರ್ಡ್ ಅನ್ನು ಚಮಚದ ಸಹಾಯದಿಂದ ಸಮನಾಗಿ ತುಂಬಿಸಿ. 1.1. ಇದರ ಮೇಲೆ ಚಿತ್ರದಲ್ಲಿ ತೋರಿಸಿರುವಂತೆ ಸೌಂದರ್ಯಯುತವಾಗಿ ಹಣ್ಣುಗಳನ್ನು ಜೋಡಿಸಿ: ಒಂದು ಬದಿಗೆ ಕಿವಿ ಸ್ಲೈಸ್, ಮತ್ತೊಂದು ಬದಿಗೆ ಕಿತ್ತಳೆ ತೊಳೆಗಳು, ಮಧ್ಯದಲ್ಲಿ ಕೆಂಪು ಸ್ಟ್ರಾಬೆರಿ, ಹಾಗೂ ಸುತ್ತಲೂ ಬ್ಲೂಬೆರ್ರಿ ಮತ್ತು ರಾಸ್ಪ್ಬೆರಿಗಳನ್ನು ಇಟ್ಟು ಸುಂದರವಾಗಿ ಅಲಂಕರಿಸಿ. 1.2. ವಿಶೇಷ ಟಿಪ್: ಹಣ್ಣುಗಳು ದೀರ್ಘಕಾಲದವರೆಗೆ ತಾಜಾವಾಗಿ ಮತ್ತು ಹೊಳೆಯುವಂತೆ ಕಾಣಲು, ಸ್ವಲ್ಪ ಜೇನುತುಪ್ಪ ಅಥವಾ ಕರಗಿಸಿದ ಜಾಮ್ ಅನ್ನು ಬ್ರಷ್ ಸಹಾಯದಿಂದ ಹಣ್ಣುಗಳ ಮೇಲೆ ಲಘುವಾಗಿ ಸವರಬಹುದು.
ನಿಮಗೆ ಈ ಮಿನಿ ಫ್ರೂಟ್ ಟಾರ್ಟ್ಸ್ ರೆಸಿಪಿ ಇಷ್ಟವಾದಲ್ಲಿ, ನಿಮ್ಮ ಸ್ನೇಹಿತರು ಮತ್ತು ಕುಟುಂಬದವರೊಂದಿಗೆ ಖಂಡಿತ ಶೇರ್ ಮಾಡಿ!