
Also try my delicious Chocolate Mousse Cake Recipe
Baked Lemon Cheesecake
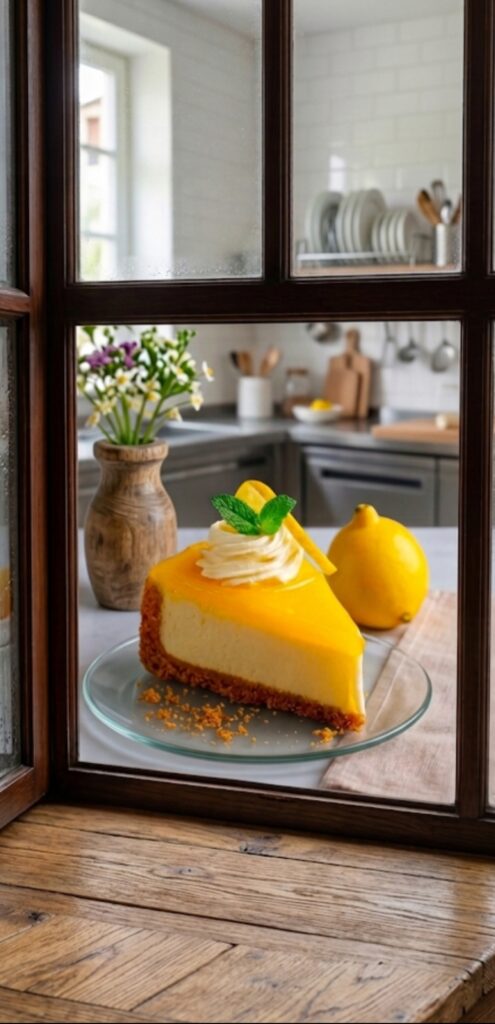
Creamy Baked Lemon Cheesecake (Glossy Curd Top)
Baked Lemon Cheesecake
If you love desserts that are a perfect balance of creamy, sweet, and tangy, this Baked Lemon Cheesecake is absolute heaven. With a buttery graham cracker crust, a rich cream cheese filling, and a bright, glossy lemon curd topping, it is as beautiful to look at as it is delicious to eat.
1. Ingredients
For the Crust:
- Graham Crackers / Digestive Biscuits: 1.5 cups (crushed)
- Melted Butter (Unsalted): 5 tbsp
- Sugar: 1 tbsp
For the Creamy Cheesecake Filling:
- Cream Cheese (Room Temperature): 400g (2 blocks)
- Granulated Sugar: 3/4 cup
- Sour Cream or Thick Yogurt: 1/2 cup
- Fresh Lemon Juice: 3 tbsp
- Lemon Zest (Grated skin): 1 tbsp
- Vanilla Extract: 1 tsp
- Eggs (Room Temperature): 2 large
For the Glossy Lemon Curd Top:
- Lemon Juice: 1/4 cup
- Sugar: 1/3 cup
- Egg Yolk: 1 large
- Butter: 2 tbsp
2. Step-by-Step Instructions
Step 1: Making the Buttery Crust
- Mix the crushed biscuit crumbs, sugar, and melted butter together in a bowl until it feels like wet sand.
- Press the mixture firmly into the bottom of a 7-inch springform cake pan to form an even layer.
- Bake the crust at 160°C for 8-10 minutes, then remove it and let it cool completely.
Step 2: Preparing the Lemon Filling
- In a large bowl, beat the cream cheese and sugar together until completely smooth and creamy (do not over-mix).
- Add the sour cream, lemon juice, lemon zest, and vanilla extract. Whisk gently until combined.
- Add the eggs one at a time, mixing on low speed just until combined.
- Pour the smooth batter over your cooled crust.
Step 3: Baking (The Water Bath Method)
- Wrap the outside of your cake pan securely with two layers of aluminum foil (to prevent water from leaking inside).
- Place the cake pan inside a larger roasting pan and pour hot water into the larger pan until it reaches halfway up the sides of the cake pan.
- Bake at 160°C for 45-50 minutes until the edges are set but the center still jiggles slightly.
- Turn off the oven, crack the oven door open slightly, and let the cheesecake cool inside for 1 hour. Then, refrigerate it for at least 4 hours.
Step 4: Adding the Glossy Top & Decoration
- In a small saucepan, whisk lemon juice, sugar, and the egg yolk on low heat until it thickens into a glossy curd. Stir in the butter and let it cool.
- Pour this bright yellow lemon curd evenly over the chilled cheesecake.
- Decorate the top with a swirl of whipped cream, a fresh lemon slice, and a tiny mint leaf, exactly like the inspiration picture!
3. SEO Focus & Meta Details
Baked Lemon http://my-dessertkitchen.com/chocolate-pastry-recipe Cheesecake
ನಿಮ್ಮ ಬ್ಲಾಗ್ನ Rank Math ಎಸ್ಇಒ ಸ್ಕೋರ್ ಅನ್ನು ಮೊದಲ ಬಾರಿಗೆ “ಗ್ರೀನ್” ಮಾಡಲು ಈ ಕೆಳಗಿನ ಮೆಟಾ ಮಾಹಿತಿಯನ್ನು ಹಾಗೆಯೇ ಬಳಸಿ:
- Focus Keyword: Baked Lemon Cheesecake
- SEO Post Title: Best & Easy Baked Lemon Cheesecake Recipe
- URL / Permalink: baked-lemon-cheesecake
- SEO Meta Description: > “Learn how to make the ultimate Baked Lemon Cheesecake at home. This easy recipe features a buttery crust, creamy center, and a glossy lemon curd top!”
4. Positives & Negatives Analysis (ಧನಾತ್ಮಕ ಮತ್ತು ಋಣಾತ್ಮಕ ಕೋಡ್)
🟢 Positives
- Zesty Refreshing Flavor: The tangy lemon curd perfectly cuts through the heavy creaminess of the cheese, making it feel lighter and incredibly refreshing.
- Stunning Visuals: The contrast between the bright, glossy yellow top, the white cream, and the golden crust creates a highly clickable photo for your blog and Instagram.
🔴 Negatives
- Risk of Cracks: Baked cheesecakes can develop cracks if over-baked or cooled too quickly. (Using the water bath method helps avoid this).
- Requires Setting Time: Just like the mousse cake, it tastes best only after chilling in the fridge for 4-6 hours to set completely.
ಕ್ರೀಮಿ ಬೇಕ್ಡ್ ಲೆಮನ್ ಚೀಸ್ಕೇಕ್ (Glossy Curd Top)
ಸಿಹಿ ಮತ್ತು ಸ್ವಲ್ಪ ಹುಳಿಯಾದ ವಿಭಿನ್ನ ರುಚಿಯ ಡೆಸರ್ಟ್ಗಳನ್ನು ಇಷ್ಟಪಡುವವರಿಗೆ ಈ ಬೇಕ್ಡ್ ಲೆಮನ್ ಚೀಸ್ಕೇಕ್ ಒಂದು ಅದ್ಭುತ ಆಯ್ಕೆ. ಬಾಯಲ್ಲಿ ಇಟ್ಟರೆ ಕರಗುವ ಕ್ರೀಮ್ ಚೀಸ್, ಗರಿಗರಿಯಾದ ಬಿಸ್ಕತ್ ಬೇಸ್ ಮತ್ತು ಮೇಲ್ಭಾಗದಲ್ಲಿ ಹೊಳೆಯುವ ನಿಂಬೆ ಹಣ್ಣಿನ ಕರ್ರಿ (Lemon Curd) ಇದರ ಆಕರ್ಷಣೆ. ಹಂತ ಹಂತವಾಗಿ ಇದನ್ನು ಸುಲಭವಾಗಿ ಮಾಡುವ ವಿಧಾನ ಇಲ್ಲಿದೆ.
Baked Lemon https://en.wikipedia.org/wiki/Cocoa_bean Cheesecake
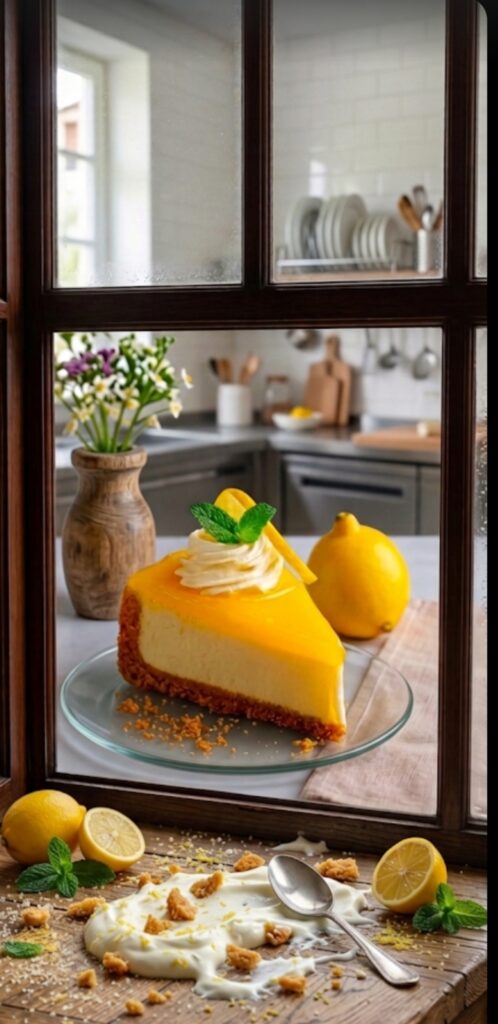
1. ಬೇಕಾಗುವ ಪದಾರ್ಥಗಳು (Ingredients)
Baked Lemon Cheesecake
ಬಿಸ್ಕತ್ ಕ್ರಸ್ಟ್ (Crust) ಮಾಡಲು:
- ಡೈಜೆಸ್ಟಿವ್ ಬಿಸ್ಕತ್ ಅಥವಾ ಗ್ಲುಕೋಸ್ ಬಿಸ್ಕತ್: 1.5 ಕಪ್ (ಪುಡಿ ಮಾಡಿದ್ದು)
- ಕರಗಿಸಿದ ಬೆಣ್ಣೆ (Unsalted Butter): 5 ಟೇಬಲ್ ಚಮಚ
- ಸಕ್ಕರೆ: 1 ಟೇಬಲ್ ಚಮಚ
ಕ್ರೀಮಿ ಚೀಸ್ಕೇಕ್ ಫಿಲ್ಲಿಂಗ್ಗಾಗಿ:
- ಕ್ರೀಮ್ ಚೀಸ್ (Cream Cheese): 400 ಗ್ರಾಂ (ಕೋಣೆ ತಾಪಮಾನದಲ್ಲಿರಲಿ)
- ಸಕ್ಕರೆ ಪುಡಿ: 3/4 ಕಪ್
- ಗಟ್ಟಿ ಮೊಸರು (Hung Curd) ಅಥವಾ ಶ್ರೇಷ್ಠ ಕ್ರೀಮ್: 1/2 ಕಪ್
- ತಾಜಾ ನಿಂಬೆ ರಸ: 3 ಟೇಬಲ್ ಚಮಚ
- ನಿಂಬೆ ಸಿಪ್ಪೆಯ ತುರಿ (Lemon Zest): 1 ಟೇಬಲ್ ಚಮಚ (ಮೇಲಿನ ಹಳದಿ ಭಾಗ ಮಾತ್ರ)
- ವೆನಿಲ್ಲಾ ಎಸೆನ್ಸ್: 1 ಟೀಸ್ಪೂನ್
- ಮೊಟ್ಟೆಗಳು: 2 (ಮೊಟ್ಟೆ ಬೇಡದಿದ್ದರೆ 1/2 ಕಪ್ ಕಂಡೆನ್ಸ್ಡ್ ಮಿಲ್ಕ್ ಬಳಸಬಹುದು)
ಮೇಲ್ಭಾಗದ ಗ್ಲಾಸಿ ಲೆಮನ್ ಕರ್ಡ್ಗಾಗಿ:
- ನಿಂಬೆ ರಸ: 1/4 ಕಪ್
- ಸಕ್ಕರೆ: 1/3 ಕಪ್
- ಮೊಟ್ಟೆಯ ಹಳದಿ ಲೋಳೆ (Egg Yolk): 1 (ಅಥವಾ 1 ಚಮಚ ಕಾರ್ನ್ಫ್ಲೋರ್ ಮಿಶ್ರಣ)
- ಬೆಣ್ಣೆ: 2 ಟೇಬಲ್ ಚಮಚ
2. ತಯಾರಿ ವಿಧಾನ (Step-by-Step Instructions)
ಹಂತ 1: ಕ್ರಸ್ಟ್ ಸಿದ್ಧತೆ
- ಒಂದು ಪಾತ್ರೆಯಲ್ಲಿ ಬಿಸ್ಕತ್ ಪುಡಿ, ಸಕ್ಕರೆ ಮತ್ತು ಕರಗಿಸಿದ ಬೆಣ್ಣೆಯನ್ನು ಚೆನ್ನಾಗಿ ಮಿಕ್ಸ್ ಮಾಡಿ. ಇದು ಒದ್ದೆ ಮರಳಿನಂತೆ ಕಾಣಿಸಬೇಕು.
- ಈ ಮಿಶ್ರಣವನ್ನು ಕೇಕ್ ಟಿನ್ನ ತಳಭಾಗಕ್ಕೆ ಹಾಕಿ, ಲೋಟದ ಹಿಂಭಾಗದಿಂದ ಗಟ್ಟಿಯಾಗಿ ಒತ್ತಿ ಸಮನಾದ ಲೇಯರ್ ಮಾಡಿ.
- ಇದನ್ನು 160°C ಗೆ ಪ್ರಿ-ಹೀಟ್ ಮಾಡಿದ ಓವನ್ನಲ್ಲಿ 8-10 ನಿಮಿಷ ಬೇಕ್ ಮಾಡಿ ಪಕ್ಕಕ್ಕೆ ಇಡಿ.
ಹಂತ 2: ಚೀಸ್ಕೇಕ್ ಬ್ಯಾಟರ್ ತಯಾರಿ
- ಒಂದು ದೊಡ್ಡ ಬೌಲ್ನಲ್ಲಿ ಕ್ರೀಮ್ ಚೀಸ್ ಮತ್ತು ಸಕ್ಕರೆಯನ್ನು ಹಾಕಿ ಎಲೆಕ್ಟ್ರಿಕ್ ಬೀಟರ್ನಿಂದ ಸಾಫ್ಟ್ ಆಗುವವರೆಗೆ ಬೀಟ್ ಮಾಡಿ. (ಹೆಚ್ಚು ಬೀಟ್ ಮಾಡಬೇಡಿ).
- ಈಗ ಅದಕ್ಕೆ ಗಟ್ಟಿ ಮೊಸರು, ನಿಂಬೆ ರಸ, ನಿಂಬೆ ಸಿಪ್ಪೆಯ ತುರಿ ಮತ್ತು ವೆನಿಲ್ಲಾ ಎಸೆನ್ಸ್ ಸೇರಿಸಿ ನಿಧಾನವಾಗಿ ಮಿಕ್ಸ್ ಮಾಡಿ.
- ನಂತರ ಮೊಟ್ಟೆಗಳನ್ನು ಒಂದೊಂದಾಗಿ ಸೇರಿಸುತ್ತಾ ಕೇವಲ ಮಿಶ್ರಣವಾಗುವಷ್ಟೇ ಬೀಟ್ ಮಾಡಿ.
- ಈ ನಯವಾದ ಬ್ಯಾಟರ್ ಅನ್ನು ಈಗ ತಣ್ಣಗಾಗಿರುವ ಬಿಸ್ಕತ್ ಲೇಯರ್ ಮೇಲೆ ಸುರಿಯಿರಿ.
ಹಂತ 3: ಬೇಕಿಂಗ್ ವಿಧಾನ (Water Bath Method)
- ಚೀಸ್ಕೇಕ್ ಪಾತ್ರೆಯ ತಳಭಾಗಕ್ಕೆ ನೀರು ಹೋಗದಂತೆ ಹೊರಗಡೆಯಿಂದ ಎರಡು ಪದರ ಅಲ್ಯೂಮಿನಿಯಂ ಫಾಯಿಲ್ನಿಂದ ಗಟ್ಟಿಯಾಗಿ ಮುಚ್ಚಿ.
- ಈಗ ಈ ಪಾತ್ರೆಯನ್ನು ಮತ್ತೊಂದು ದೊಡ್ಡ ಟ್ರೇ ಅಥವಾ ಪಾತ್ರೆಯ ಮಧ್ಯದಲ್ಲಿ ಇಟ್ಟು, ಆ ದೊಡ್ಡ ಪಾತ್ರೆಗೆ ಅರ್ಧದಷ್ಟು ಬಿಸಿ ನೀರನ್ನು ತುಂಬಿಸಿ (Water Bath).
- 160°C ತಾಪಮಾನದಲ್ಲಿ 45-50 ನಿಮಿಷ ಬೇಕ್ ಮಾಡಿ. ಕೇಕ್ನ ಮಧ್ಯಭಾಗ ಸ್ವಲ್ಪ ಜಿಗಲ್ (ಆಡುತ್ತಿರಬೇಕು) ಆಗುತ್ತಿರುವಾಗ ಓವನ್ ಆಫ್ ಮಾಡಿ.
- ಓವನ್ ಬಾಗಿಲನ್ನು ಸ್ವಲ್ಪ ತೆರೆದು 1 ಗಂಟೆ ಒಳಗಡೆಯೇ ತಣ್ಣಗಾಗಲು ಬಿಡಿ. ನಂತರ ಫ್ರಿಡ್ಜ್ನಲ್ಲಿ 4 ಗಂಟೆ ಇಡಿ.
ಹಂತ 4: ಲೆಮನ್ ಕರ್ಡ್ ಮತ್ತು ಅಲಂಕಾರ
- ಒಂದು ಸಣ್ಣ ಪಾತ್ರೆಯಲ್ಲಿ ನಿಂಬೆ ರಸ, ಸಕ್ಕರೆ ಮತ್ತು ಕಾರ್ನ್ಫ್ಲೋರ್ ನೀರನ್ನು (ಅಥವಾ ಮೊಟ್ಟೆಯ ಲೋಳೆ) ಹಾಕಿ ಸಣ್ಣ ಉರಿಯಲ್ಲಿ ಕೈಯಾಡಿಸುತ್ತಾ ಬಿಸಿ ಮಾಡಿ. ಅದು ಗಟ್ಟಿಯಾಗಿ ಹೊಳೆಯುವ ಕ್ರೀಮ್ ತರಹ ಆಗುತ್ತದೆ. ಕೊನೆಯಲ್ಲಿ ಬೆಣ್ಣೆ ಸೇರಿಸಿ ತಣ್ಣಗಾಗಲು ಬಿಡಿ.
- ಈ ಹೊಳೆಯುವ ಹಳದಿ ಲೆಮನ್ ಕರ್ಡ್ ಅನ್ನು ಫ್ರಿಡ್ಜ್ನಿಂದ ತೆಗೆದ ಚೀಸ್ಕೇಕ್ ಮೇಲ್ಭಾಗಕ್ಕೆ ಸಮನಾಗಿ ಹರಡಿ.
- ಚಿತ್ರದಲ್ಲಿರುವಂತೆ ಸ್ವಲ್ಪ ವಿಪ್ಡ್ ಕ್ರೀಮ್, ನಿಂಬೆ ಹಣ್ಣಿನ ಸ್ಲೈಸ್ ಮತ್ತು ಪುದೀನಾ ಎಲೆಯಿಂದ ಆಕರ್ಷಕವಾಗಿ ಅಲಂಕರಿಸಿ.
3. ರೆಸಿಪಿಯ ಧನಾತ್ಮಕ ಮತ್ತು ಋಣಾತ್ಮಕ ಕೋಡ್ (Positives & Negatives Analysis)
🟢 ಧನಾತ್ಮಕ ಅಂಶಗಳು (Positives / Advantages)
Baked Lemon Cheesecake
- ವಿಭಿನ್ನ ಮತ್ತು ಪ್ರೀಮಿಯಂ ರುಚಿ: ಕೇವಲ ಸಿಹಿಯಷ್ಟೇ ಇರದೆ, ನಿಂಬೆ ಹಣ್ಣಿನ ಲವಲವಿಕೆಯ ಹುಳಿ ರುಚಿ ಇರುವುದರಿಂದ ಇದು ತಿನ್ನಲು ತುಂಬಾ ರಿಫ್ರೆಶಿಂಗ್ ಆಗಿರುತ್ತದೆ.
- ಅತ್ಯದ್ಭುತ ಲುಕ್: ಕಡು ಹಳದಿ ಬಣ್ಣದ ಹೊಳೆಯುವ ಮೇಲ್ಭಾಗ ಮತ್ತು ಬಿಳಿ ಕ್ರೀಮ್ನ ಕಾಂಟ್ರಾಸ್ಟ್ ಇನ್ಸ್ಟಾಗ್ರಾಮ್ ಅಥವಾ ಬ್ಲಾಗ್ ಫೋಟೋಗಳಿಗೆ ಅತ್ಯುತ್ತಮವಾಗಿ ಕಾಣಿಸುತ್ತದೆ. ಅತಿಥಿಗಳಿಗೆ ಬಡಿಸಲು ಇದು ಬೆಸ್ಟ್ ಡೆಸರ್ಟ್.
🔴 ಋಣಾತ್ಮಕ ಅಂಶಗಳು (Negatives / Challenges)
Baked Lemon Cheesecake
- ಬಿರುಕು ಬಿಡುವ ಸಾಧ್ಯತೆ (Cracking Risk): ಬೇಕ್ಡ್ ಚೀಸ್ಕೇಕ್ಗಳನ್ನು ಸರಿಯಾದ ತಾಪಮಾನದಲ್ಲಿ ಬೇಕ್ ಮಾಡದಿದ್ದರೆ ಅಥವಾ ಬೇಗನೆ ತಣ್ಣಗಾಗಿಸಿದರೆ ಮೇಲ್ಭಾಗದಲ್ಲಿ ಬಿರುಕುಗಳು (Cracks) ಬೀಳಬಹುದು.
- ಕಾಯುವಿಕೆ ಅಗತ್ಯ: ಇದನ್ನು ಬೇಕ್ ಮಾಡಿದ ತಕ್ಷಣ ಕತ್ತರಿಸಲು ಬರುವುದಿಲ್ಲ. ಫ್ರಿಡ್ಜ್ನಲ್ಲಿ ಕನಿಷ್ಠ 4 ರಿಂದ 6 ಗಂಟೆಗಳ ಕಾಲ ಇಟ್ಟಾಗ ಮಾತ್ರ ಇದು ಪರ್ಫೆಕ್ಟ್ ಶೇಪ್ಗೆ ಬರುತ್ತದೆ.
ನನ್ನ ಹೊಸ ಬ್ಲಾಗ್ನಲ್ಲಿ ‘ಕ್ರೀಮಿ ಬೇಕ್ಡ್ ಲೆಮನ್ ಚೀಸ್ಕೇಕ್’ (Baked Lemon Cheesecake) ರೆಸಿಪಿಯನ್ನು ಸ್ಟೆಪ್-ಬೈ-ಸ್ಟೆಪ್ ವಿವರಣೆಯೊಂದಿಗೆ ಪೋಸ್ಟ್ ಮಾಡಿದ್ದೇನೆ. ನಿಂಬೆಹಣ್ಣಿನ ಲವಲವಿಕೆಯ ಹುಳಿ ಮತ್ತು ಕ್ರೀಮ್ ಚೀಸ್ನ ಅದ್ಭುತ ರುಚಿ ಇದರಲ್ಲಿದೆ. ಒಮ್ಮೆ ಓದಿ ನೋಡಿ, ನಿಮಗೂ ಇಷ್ಟವಾಗುತ್ತದೆ! 🍋🍰”