
If you are looking for a rich and creamy dessert, this Chocolate Mousse Cake
Chocolate Mousse Cake
ChocolateMousseCake
Making a bakery-style luxury chocolate cake at home is easier than you think. With the right measurements and a little patience, you can create this rich, velvety, melt-in-the-mouth dessert. We will make this in three main steps: the Sponge Cake Base, the Middle Ganache/Jelly Layer, and the Creamy Mousse Top.
1.Ingredients for Chocolate Mousse Layered Cake
Chocolate Mousse Cake
For the Chocolate Sponge Base:
- All-Purpose Flour (Maida): 1 cup
- Cocoa Powder: 1/4 cup (Good quality)
- Powdered Sugar: 3/4 cup
- Baking Powder: 1 tsp
- Baking Soda: 1/2 tsp
- Milk: 1/2 cup
- Refined Oil (Flavorless): 1/4 cup
- Vanilla Essence: 1 tsp
For the Chocolate Mousse Layer:
- Dark Chocolate (Chopped): 200g
- Whipping Cream: 1 cup
For the Middle Ganache Layer:
- Dark Chocolate: 100g
- Fresh Cream: 1/2 cup
2. Step-by-Step Instructions
Chocolate Mousse Cake
Step 1: Making the Sponge Cake
- Sift the flour, cocoa powder, baking powder, and baking soda together in a bowl and keep aside.
- In another bowl, whisk the milk, oil, powdered sugar, and vanilla essence until the sugar dissolves completely.
- Gradually add the dry ingredients to the wet mixture and mix gently using the “cut and fold” method. Ensure there are no lumps.
- Pour the batter into a greased baking tin and bake in a preheated oven at 180°C for 25-30 minutes (or in a heavy-bottomed pot on low heat for 35 minutes).
- Once baked, let the cake cool down completely, then slice it horizontally into two layers.
Step 2: Preparing the Middle Ganache
- Warm the fresh cream slightly and add the chopped chocolate to it.
- Stir continuously until the chocolate melts completely into a smooth glaze. Let it cool to room temperature.
Step 3: Preparing the Chocolate Mousse
Chocolate Mousse Cake Recipe
- Melt the dark chocolate using a double boiler (or microwave) and let it cool down until it is just lukewarm.
- Whip the heavy whipping cream using an electric mixer until it reaches soft peaks.
- Gently fold the melted chocolate into the whipped cream until fully combined. Your smooth mousse is ready.
Step 4: Assembling the Cake
Chocolate Mousse Layered Cake”
- Place the first layer of sponge cake on a board and brush it with a little sugar syrup to keep it moist.
- Spread a layer of the prepared chocolate mousse evenly on top.
- Pour and smooth out the middle chocolate ganache layer over the mousse.
- Place the second sponge layer on top, and cover the entire cake with the remaining chocolate mousse.
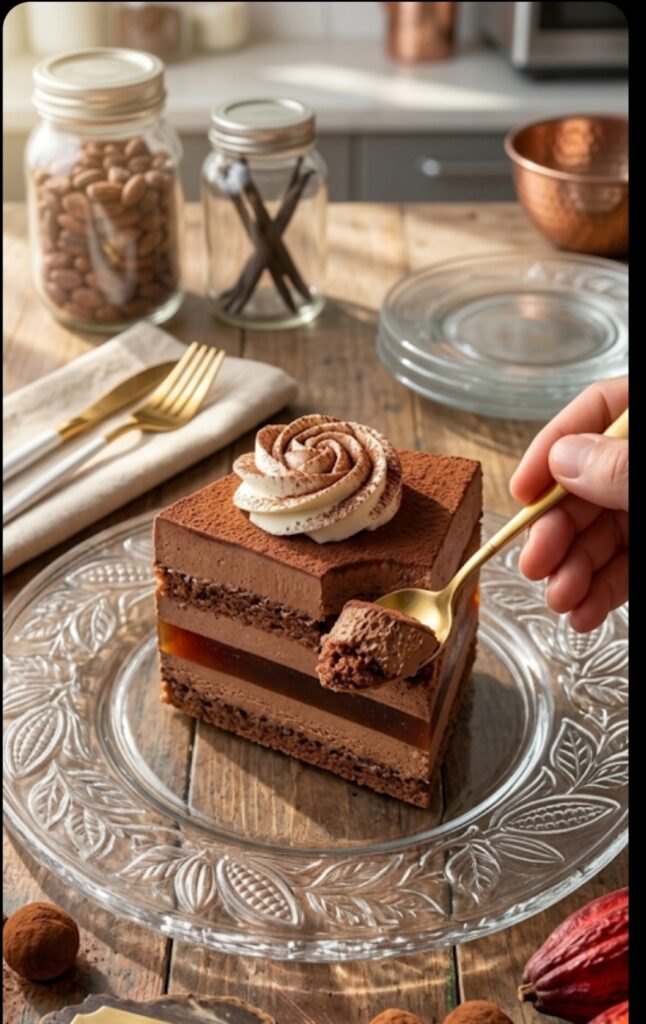
- Dust the top with cocoa powder and decorate with a whipped cream rosette, just like in the picture.
- Crucial Step: Refrigerate the cake for at least 4 to 6 hours to set properly before slicing.
3. Positives & Negatives Analysis (ಧನಾತ್ಮಕ ಮತ್ತು ಋಣಾತ್ಮಕ ಕೋಡ್)
Before you start baking, it is helpful to know the pros and cons of this recipe:
Chocolate Mousse Cake
🟢 Positives (Advantages)
- Exceptional Texture & Taste: Unlike regular cakes, the mousse layer gives this dessert a premium, velvety, melt-in-the-mouth texture that tastes incredibly luxurious.
- Professional Presentation: As seen in the picture, it looks exactly like an expensive artisanal cake bought from a high-end bakery, making it perfect for special occasions.
- Customizable: You can easily swap dark chocolate for milk chocolate, or add fruit fillings like peach or strawberry compote in the middle layer to experiment with flavors.
🔴 Negatives (Challenges)
Chocolate Mousse Layered Cake
- Long Waiting Time: This cake requires patience. It cannot be eaten immediately after assembly; it needs to sit in the fridge for 4-6 hours to set and hold its shape.
- High in Calories: Packed with heavy cream, chocolate, and sugar, this cake is a heavy indulgence and is not suitable for weight-watchers or daily consumption.
- Temperature Sensitive: The mousse will start to melt or lose its firm shape if left at room temperature for too long. It must be stored in the refrigerator until the exact moment of serving.
4. Quick Pro-Tips for Success
Chocolate Mousse Cake
- Ensure your whipping cream and the bowl are chilled before whipping.
- Never add hot melted chocolate to the whipped cream, or the cream will collapse into a watery liquid.
- To get clean, sharp layers when cutting (like in the picture), dip your knife in hot water and wipe it clean before making each slice.
ಬೆಸ್ಟ್ ಅಂಡ್ ಈಜಿ ಚಾಕೊಲೇಟ್ ಮೂಸ್ ಲೇಯರ್ಡ್ ಕೇಕ್
Chocolate Mousse Cake
ಮನೆಯಲ್ಲಿಯೇ ಬೇಕರಿ ಶೈಲಿಯ ಐಷಾರಾಮಿ ಚಾಕೊಲೇಟ್ ಕೇಕ್ ಮಾಡುವುದು ಅಷ್ಟು ಕಷ್ಟವೇನಲ್ಲ. ಸರಿಯಾದ ಅಳತೆ ಮತ್ತು ತಾಳ್ಮೆ ಇದ್ದರೆ ಸಾಕು. ಈ ರೆಸಿಪಿಯಲ್ಲಿ ನಾವು ಮೂರು ಮುಖ್ಯ ಹಂತಗಳನ್ನು ನೋಡಲಿದ್ದೇವೆ: ಬೇಸ್ ಸ್ಪಾಂಜ್ ಕೇಕ್, ಮಧ್ಯದ ಜೆಲ್ಲಿ/ಗನಾಶ್ ಲೇಯರ್, ಮತ್ತು ಮೇಲಿನ ಮೃದುವಾದ ಮೂಸ್.
1. ಬೇಕಾಗುವ ಪದಾರ್ಥಗಳು (Ingredients)
Chocolate Mousse Cake
ಚಾಕೊಲೇಟ್ ಸ್ಪಾಂಜ್ ಬೇಸ್ಗಾಗಿ:
- ಮೈದಾ ಹಿಟ್ಟು: 1 ಕಪ್
- ಕೋಕೋ ಪೌಡರ್: 1/4 ಕಪ್ (ಉತ್ತಮ ಗುಣಮಟ್ಟದ್ದು)
- ಸಕ್ಕರೆ ಪುಡಿ: 3/4 ಕಪ್
- ಬೇಕಿಂಗ್ ಪೌಡರ್: 1 ಟೀಸ್ಪೂನ್
- ಬೇಕಿಂಗ್ ಸೋಡಾ: 1/2 ಟೀಸ್ಪೂನ್
- ಹಾಲು: 1/2 ಕಪ್
- ಸಂಸ್ಕರಿಸಿದ ಎಣ್ಣೆ (ವಾಸನೆ ಇಲ್ಲದ): 1/4 ಕಪ್
- ವೆನಿಲ್ಲಾ ಎಸೆನ್ಸ್: 1 ಟೀಸ್ಪೂನ್
ಚಾಕೊಲೇಟ್ ಮೂಸ್ ಲೇಯರ್ಗಾಗಿ:
- ಡಾರ್ಕ್ ಚಾಕೊಲೇಟ್ (ತುರಿದದ್ದು): 200 ಗ್ರಾಂ
- ವಿಪ್ಪಿಂಗ್ ಕ್ರೀಮ್ (Whipping Cream): 1 ಕಪ್
ಮಧ್ಯದ ಜೆಲ್ಲಿ ಅಥವಾ ಗನಾಶ್ ಲೇಯರ್ಗಾಗಿ:
- ಡಾರ್ಕ್ ಚಾಕೊಲೇಟ್: 100 ಗ್ರಾಂ
- ಫ್ರೆಶ್ ಕ್ರೀಮ್: 1/2 ಕಪ್
2. ತಯಾರಿ ವಿಧಾನ (Step-by-Step Instructions)
Chocolate Mousse Cake
Chocolate Mousse Cake
ಹಂತ 1: ಸ್ಪಾಂಜ್ ಕೇಕ್ ತಯಾರಿಕೆ
- ಮೊದಲು ಒಂದು ಪಾತ್ರೆಯಲ್ಲಿ ಮೈದಾ, ಕೋಕೋ ಪೌಡರ್, ಬೇಕಿಂಗ್ ಪೌಡರ್ ಮತ್ತು ಬೇಕಿಂಗ್ ಸೋಡಾವನ್ನು ಚೆನ್ನಾಗಿ ಜರಡಿ ಹಿಡಿದು ಪಕ್ಕಕ್ಕೆ ಇಟ್ಟುಕೊಳ್ಳಿ.
- ಇನ್ನೊಂದು ಪಾತ್ರೆಯಲ್ಲಿ ಹಾಲು, ಎಣ್ಣೆ, ಸಕ್ಕರೆ ಪುಡಿ ಮತ್ತು ವೆನಿಲ್ಲಾ ಎಸೆನ್ಸ್ ಹಾಕಿ ಸಕ್ಕರೆ ಕರಗುವವರೆಗೆ ಚೆನ್ನಾಗಿ ಮಿಶ್ರಣ ಮಾಡಿ.
- ಈಗ ಒಣ ಪದಾರ್ಥಗಳನ್ನು (ಮೈದಾ ಮಿಶ್ರಣ) ಈ ಹಾಲಿನ ಮಿಶ್ರಣಕ್ಕೆ ಸ್ವಲ್ಪ ಸ್ವಲ್ಪವಾಗಿ ಸೇರಿಸುತ್ತಾ “ಕಟ್ ಅಂಡ್ ಫೋಲ್ಡ್” ವಿಧಾನದಲ್ಲಿ ಮಿಕ್ಸ್ ಮಾಡಿ. ಗಂಟುಗಳಿರಬಾರದು.
- ಗ್ರೀಸ್ ಮಾಡಿದ ಬೇಕಿಂಗ್ ಟಿನ್ಗೆ ಈ ಬ್ಯಾಟರ್ ಹಾಕಿ, 180°C ಗೆ ಪ್ರಿ-ಹೀಟ್ ಮಾಡಿದ ಓವನ್ನಲ್ಲಿ 25-30 ನಿಮಿಷ ಬೇಕ್ ಮಾಡಿ. (ಓವನ್ ಇಲ್ಲದಿದ್ದರೆ ದಪ್ಪ ತಳದ ಪಾತ್ರೆಯಲ್ಲಿ ಉಪ್ಪು ಹಾಕಿ ಸ್ಟ್ಯಾಂಡ್ ಇಟ್ಟು 35 ನಿಮಿಷ ಸಣ್ಣ ಉರಿಯಲ್ಲಿ ಬೇಕ್ ಮಾಡಬಹುದು).
- ಕೇಕ್ ಬೆಂದ ನಂತರ ಸಂಪೂರ್ಣವಾಗಿ ತಣ್ಣಗಾಗಲು ಬಿಡಿ. ನಂತರ ಅದನ್ನು ಎರಡು ಲೇಯರ್ಗಳಾಗಿ ಕತ್ತರಿಸಿ.
ಹಂತ 2: ಮಧ್ಯದ ಗನಾಶ್ ಲೇಯರ್
- ಫ್ರೆಶ್ ಕ್ರೀಮ್ ಅನ್ನು ಸ್ವಲ್ಪ ಬಿಸಿ ಮಾಡಿ ಅದಕ್ಕೆ ತುರಿದ ಚಾಕೊಲೇಟ್ ಸೇರಿಸಿ.
- ಚಾಕೊಲೇಟ್ ಸಂಪೂರ್ಣವಾಗಿ ಕರಗಿ ಮೃದುವಾದ ಮಿಶ್ರಣವಾಗುವವರೆಗೆ ಕೈ ಆಡಿಸಿ. ಇದನ್ನು ರೂಮ್ ಟೆಂಪ್ರೇಚರ್ಗೆ ತನ್ನಿ.
ಹಂತ 3: ಚಾಕೊಲೇಟ್ ಮೂಸ್ ಸಿದ್ಧತೆ
- ಡಾರ್ಕ್ ಚಾಕೊಲೇಟ್ ಅನ್ನು ಡಬಲ್ ಬಾಯ್ಲರ್ ವಿಧಾನದಲ್ಲಿ (ಬಿಸಿ ನೀರಿನ ಪಾತ್ರೆಯ ಮೇಲೆ ಮತ್ತೊಂದು ಪಾತ್ರೆ ಇಟ್ಟು) ಕರಗಿಸಿ ತಣ್ಣಗಾಗಲು ಬಿಡಿ.
- ವಿಪ್ಪಿಂಗ್ ಕ್ರೀಮ್ ಅನ್ನು ಎಲೆಕ್ಟ್ರಿಕ್ ಬೀಟರ್ ಬಳಸಿ “ಸಾಫ್ಟ್ ಪೀಕ್ಸ್” ಬರುವವರೆಗೆ ಚೆನ್ನಾಗಿ ಬೀಟ್ ಮಾಡಿ.
- ಈಗ ಕರಗಿದ ಚಾಕೊಲೇಟ್ ಅನ್ನು ಈ ವಿಪ್ಡ್ ಕ್ರೀಮ್ಗೆ ಸೇರಿಸಿ, ನಿಧಾನವಾಗಿ ಮಿಕ್ಸ್ ಮಾಡಿ. ನಿಮ್ಮ ಮೃದುವಾದ ಚಾಕೊಲೇಟ್ ಮೂಸ್ ಸಿದ್ಧ.
ಹಂತ 4: ಕೇಕ್ ಜೋಡಣೆ (Assembling)
Chocolate Mousse Layered Cake
- ಒಂದು ಕೇಕ್ ಬೋರ್ಡ್ ಅಥವಾ ಪ್ಲೇಟ್ ಮೇಲೆ ಮೊದಲ ಚಾಕೊಲೇಟ್ ಸ್ಪಾಂಜ್ ಲೇಯರ್ ಇಡಿ. ಅದಕ್ಕೆ ಸ್ವಲ್ಪ ಸಕ್ಕರೆ ನೀರನ್ನು (Sugar Syrup) ಚಿಮುಕಿಸಿ.
- ಅದರ ಮೇಲೆ ತಯಾರಿಸಿದ ಮೂಸ್ನ ಒಂದು ಲೇಯರ್ ಹರಡಿ.
- ನಂತರ ಮಧ್ಯದಲ್ಲಿ ಸಿದ್ಧಪಡಿಸಿದ ಚಾಕೊಲೇಟ್ ಗನಾಶ್ ಅಥವಾ ಜೆಲ್ಲಿ ಲೇಯರ್ ಅನ್ನು ನಿಧಾನವಾಗಿ ಹರಡಿ.
- ಇದರ ಮೇಲೆ ಎರಡನೇ ಸ್ಪಾಂಜ್ ಲೇಯರ್ ಇಟ್ಟು, ಉಳಿದ ಚಾಕೊಲೇಟ್ ಮೂಸ್ನಿಂದ ಕೇಕ್ ಅನ್ನು ಸಂಪೂರ್ಣವಾಗಿ ಕವರ್ ಮಾಡಿ.
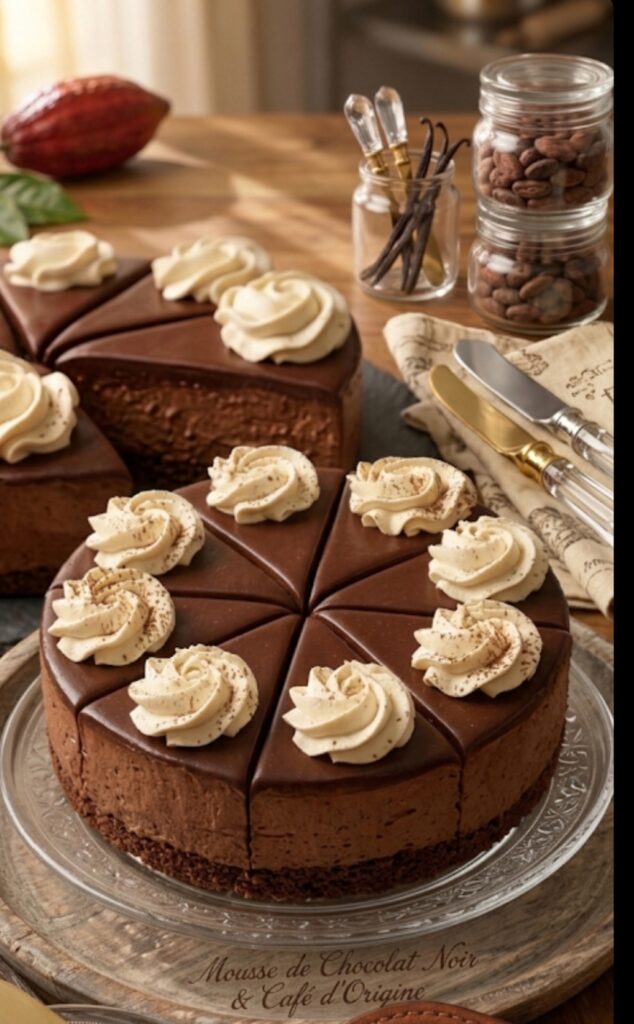
- ಕೊನೆಯಲ್ಲಿ ಮೇಲ್ಭಾಗಕ್ಕೆ ಕೋಕೋ ಪೌಡರ್ ಅನ್ನು ಜರಡಿ ಹಿಡಿದು ಧೂಳೀಕರಿಸಿ (Dusting) ಮತ್ತು ಚಿತ್ರದಲ್ಲಿರುವಂತೆ ಸ್ವಲ್ಪ ವಿಪ್ಡ್ ಕ್ರೀಮ್ನಿಂದ ರೋಸ್ ಡಿಸೈನ್ ಮಾಡಿ.
- ಈ ಕೇಕ್ ಅನ್ನು ಕನಿಷ್ಠ 4 ರಿಂದ 5 ಗಂಟೆಗಳ ಕಾಲ ಫ್ರಿಡ್ಜ್ನಲ್ಲಿ ಸೆಟ್ ಆಗಲು ಇಡಿ.
3. ರೆಸಿಪಿಯ ಧನಾತ್ಮಕ ಮತ್ತು ಋಣಾತ್ಮಕ ಕೋಡ್ (Positives & Negatives Analysis)
ಯಾವುದೇ ರೆಸಿಪಿಯನ್ನು ಮಾಡುವ ಮುನ್ನ ಅದರ ಸಾಧಕ-ಬಾಧಕಗಳನ್ನು ಅರಿಯುವುದು ಮುಖ್ಯ. ಈ ಕೇಕ್ನ ವಿಶ್ಲೇಷಣೆ ಇಲ್ಲಿದೆ:
Chocolate Mousse Layered https://www.kingarthurbaking.com/blog/2020/07/15/how-to-choose-the-right-cocoa-powder Cake
🟢 ಧನಾತ್ಮಕ ಅಂಶಗಳು (Positives / Advantages)
- ಅಪ್ರತಿಮ ರುಚಿ ಮತ್ತು ವಿನ್ಯಾಸ (Texture): ಈ ಕೇಕ್ ಸಾಮಾನ್ಯ ಕೇಕ್ಗಳಿಗಿಂತ ಭಿನ್ನವಾಗಿದೆ. ಮೂಸ್ ಲೇಯರ್ ಇರುವುದರಿಂದ ಇದು ಬಾಯಲ್ಲಿ ಇಟ್ಟರೆ ಕರಗುವಂತಹ (Melt-in-the-mouth) ಮೃದುತ್ವವನ್ನು ನೀಡುತ್ತದೆ.
- ಮನೆಯಲ್ಲೇ ಬೇಕರಿ ಲುಕ್: ಚಿತ್ರದಲ್ಲಿ ಕಾಣುವಂತೆ ಅತಿಥಿಗಳಿಗೆ ಅಥವಾ ಪಾರ್ಟಿಗಳಿಗೆ ಇದನ್ನು ಮಾಡಿದರೆ, ಎಲ್ಲರೂ ಇದನ್ನು ಪ್ರೊಫೆಷನಲ್ ಬೇಕರಿಯಿಂದ ತಂದಿದ್ದು ಎಂದೇ ಭಾವಿಸುತ್ತಾರೆ. ಆ ಮಟ್ಟಿಗೆ ಇದರ ನೋಟ ಆಕರ್ಷಕವಾಗಿರುತ್ತದೆ.
- ಅಂಡ್ಲೆಸ್ ಕಸ್ಟಮೈಸೇಶನ್: ಡಾರ್ಕ್ ಚಾಕೊಲೇಟ್ ಇಷ್ಟಪಡದವರು ಮಿಲ್ಕ್ ಚಾಕೊಲೇಟ್ ಅಥವಾ ವೈಟ್ ಚಾಕೊಲೇಟ್ ಬಳಸಬಹುದು. ಮಧ್ಯದ ಲೇಯರ್ಗೆ ಪೀಚ್ ಅಥವಾ ಸ್ಟ್ರಾಬೆರಿ ಕಾಂಪೋಟ್ (Fruit Compote) ಸೇರಿಸಿ ಹೊಸ ರುಚಿ ನೀಡಬಹುದು.
🔴 ಋಣಾತ್ಮಕ ಅಂಶಗಳು (Negatives / Challenges)
- ಹೆಚ್ಚಿನ ಕಾಯುವಿಕೆ ಸಮಯ (Time Consuming): ಈ ಕೇಕ್ ತಕ್ಷಣ ತಿನ್ನಲು ಸಾಧ್ಯವಿಲ್ಲ. ಮೂಸ್ ಮತ್ತು ಗನಾಶ್ ಸರಿಯಾದ ಆಕಾರದಲ್ಲಿ ನಿಲ್ಲಲು (Set ಆಗಲು) ಫ್ರಿಡ್ಜ್ನಲ್ಲಿ ಕನಿಷ್ಠ 4-6 ಗಂಟೆ ಅಥವಾ ಇಡೀ ರಾತ್ರಿ ಇಡಬೇಕಾಗುತ್ತದೆ. ತಾಳ್ಮೆ ತುಂಬಾ ಮುಖ್ಯ.
- ಕ್ಯಾಲೋರಿ ಪ್ರಮಾಣ ಹೆಚ್ಚಿರುತ್ತದೆ: ಇದರಲ್ಲಿ ಕ್ರೀಮ್, ಚಾಕೊಲೇಟ್ ಮತ್ತು ಸಕ್ಕರೆ ಅಧಿಕವಾಗಿರುವುದರಿಂದ ಇದು ಆರೋಗ್ಯ ಪ್ರಿಯರಿಗೆ ಅಥವಾ ಡಯಟ್ ಮಾಡುವವರಿಗೆ ಸೂಕ್ತವಲ್ಲ. ಇದು ಕೇವಲ ಸಾಂದರ್ಭಿಕ ಸಂಭ್ರಮಗಳಿಗೆ ಸೀಮಿತ.
- ತಾಪಮಾನದ ಸೂಕ್ಷ್ಮತೆ (Temperature Sensitive): ಈ ಕೇಕ್ ಕೋಣೆ ತಾಪಮಾನದಲ್ಲಿ (Room Temperature) ದೀರ್ಘಕಾಲ ಇದ್ದರೆ ಮೂಸ್ ಕರಗಲು ಪ್ರಾರಂಭವಾಗುತ್ತದೆ. ಆದ್ದರಿಂದ ಬಡಿಸುವವರೆಗೂ ಇದನ್ನು ಫ್ರಿಡ್ಜ್ನಲ್ಲಿಯೇ ಇಡಬೇಕು.
4. ಯಶಸ್ವಿ ಕೇಕ್ ಮಾಡಲು ಉಪಯುಕ್ತ ಸಲಹೆಗಳು (Tips for Success)
Chocolate Mousse Layered https://my-dessertkitchen.com/chocolate-entremet/ Cake
- ಕ್ರೀಮ್ ಬೀಟ್ ಮಾಡುವಾಗ ಪಾತ್ರೆ ಮತ್ತು ಬೀಟರ್ ಬ್ಲೇಡ್ಗಳು ತಣ್ಣಗಿರಲಿ.
- ಚಾಕೊಲೇಟ್ ಕರಗಿಸಿದ ನಂತರ ಅದು ಬಿಸಿಯಾಗಿರುವಾಗಲೇ ಕ್ರೀಮ್ಗೆ ಸೇರಿಸಬೇಡಿ, ಕ್ರೀಮ್ ಕರಗಿ ನೀರಾಗಬಹುದು. ಚಾಕೊಲೇಟ್ ಉಗುರುಬೆಚ್ಚಗಿರಬೇಕು.
- ಕೇಕ್ ಕತ್ತರಿಸುವಾಗ ಪ್ರತಿ ಬಾರಿಯೂ ಚಾಕುವನ್ನು ಬಿಸಿ ನೀರಿನಲ್ಲಿ ಅದ್ದಿ, ಒರೆಸಿ ಕತ್ತರಿಸಿದರೆ ಚಿತ್ರದಲ್ಲಿರುವಂತೆ ಲೇಯರ್ಗಳು ಸ್ಪಷ್ಟವಾಗಿ ಮತ್ತು ಅಂದವಾಗಿ ಕಾಣಿಸುತ್ತವೆ.
Chocolate Mousse Layered https://my-dessertkitchen.com/matcha-oreo-mousse-cake/ Cake
Before you start making the chocolate mousse cake…”, “To serve this delicious chocolate mousse cake…”
ಈ ರೆಸಿಪಿ ಇಷ್ಟವಾದಲ್ಲಿ ನಿಮ್ಮ ಫ್ರೆಂಡ್ಸ್ ಅಂಡ್ ಫ್ಯಾಮಿಲಿಗೆ ಶೇರ್ ಮಾಡಿ❤️ ಸಪೋರ್ಟ್ ಮಾಡಿ