
Pistachio Pudding Recipe
“If you are looking for a creamy and delicious Pistachio Pudding Recipe, you have come to the right place.”
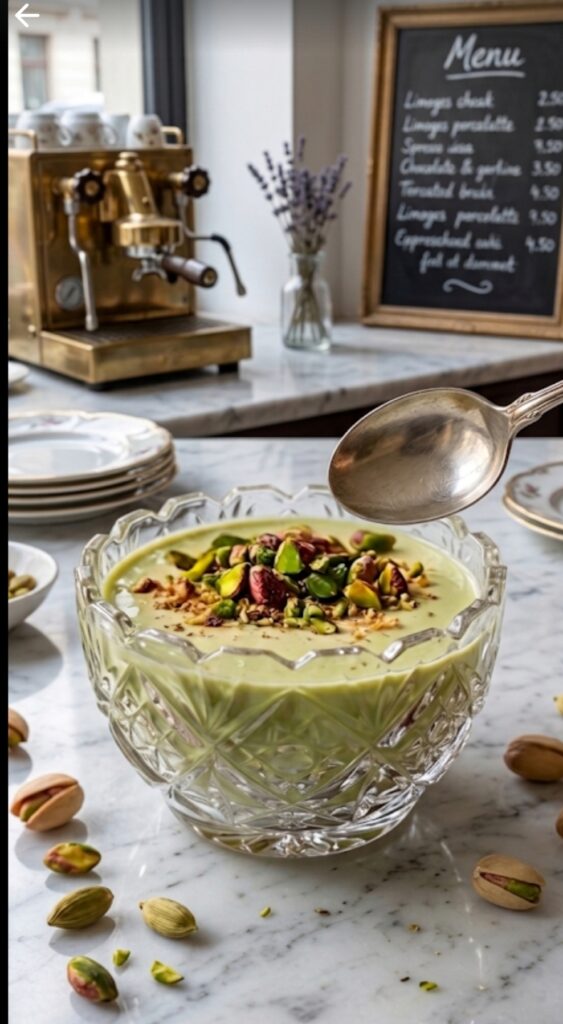
Delicious Creamy Pistachio Pudding: An Easy Home Recipe
Pistachio Pudding Recipe
When we think of desserts, chocolate and vanilla are often the first things that come to mind. However, if you want to try something unique, elegant, and incredibly flavorful, Pistachio Pudding is the perfect choice. Its beautiful light green color and rich, nutty taste make it a showstopper for festivals, parties, or weekend treats.
In this article, we will guide you through a simple, step-by-step process to make this premium dessert with basic kitchen ingredients.
Ingredients You’ll Need
Pistachio Pudding Recipe
- Milk: 500ml (Full-fat milk works best for a creamy texture)
- Pistachios: ½ cup (Soaked and peeled)
- Sugar: ½ cup (Adjust according to your taste)
- Cornstarch: 3 tbsp (To thicken the pudding)
- Cardamom Powder: A pinch (For a traditional aroma)
- Green Food Color: 1 drop (Optional, for a vibrant look)
- Garnish: Chopped pistachios or almond flakes
Step-by-Step Preparation
Pistachio Pudding Https://my-dessertkitchen.com/easy-strawberry-layered-tiramisu-eggless/ Recipe
Step 1: Prepare the Pistachio Paste
Soak the pistachios in warm water for 15–20 minutes. Peel off the skin and blend them into a smooth paste using a little milk. This paste provides the natural flavor and color to your pudding.
Step 2: Heat the Milk
In a heavy-bottomed pan, pour the milk and bring it to a boil over medium heat. Add sugar and stir until it dissolves completely.
Step 3: Add the Flavor
Once the milk starts boiling, add the prepared pistachio paste. Stir well and cook for 2–3 minutes to let the flavors blend beautifully.
Step 4: Thicken the Pudding
In a small bowl, mix 3 tablespoons of cornstarch with a little cold milk to make a smooth slurry (ensure there are no lumps). Slowly pour this slurry into the boiling milk while stirring continuously. You will notice the mixture thickening into a creamy consistency.
Step 5: Final Touch
Add cardamom powder and a drop of food color (if using). Stir for one more minute and turn off the heat. The mixture will thicken further as it cools.
Step 6: Set and Serve
Pour the warm pudding into serving bowls or glasses. Garnish with chopped pistachios. Let it cool to room temperature, then refrigerate for at least 3 hours. Serve chilled!
Pros of This Recipe (Positive Aspects
)Pistachio Pudding Recipe
- Nutritious Ingredients: Pistachios are packed with antioxidants, healthy fats, and protein, making this a slightly healthier dessert option.
- Quick & Easy: You don’t need an oven or complicated equipment. It takes less than 30 minutes of active cooking time.
- Kid-Friendly: Children love the creamy texture and the fun green color.
- Make-Ahead Dessert: You can prepare this a day in advance, which is perfect for hosting guests.
Cons to Consider (Negative/Challenges)
Pistachio Pudding Recipe
- Calorie Dense: Since it uses full-cream milk and sugar, it is high in calories. (Tip: Use stevia or jaggery for a lighter version).
- Lump Formation: If the cornstarch is not stirred properly, it can form lumps quickly.
- Short Shelf Life: Because it is milk-based, it must be kept refrigerated and consumed within 2 days.
Pro-Tips for the Best Results
- Use Fresh Nuts: Always use fresh, unsalted pistachios to avoid any bitter aftertaste.
- Add Saffron: For a “Royal” or “Shahi” touch, add a few strands of saffron while boiling the milk.
- Texture Variation: If you like a bit of crunch, don’t grind the pistachios into a total paste—keep them slightly coarse.
Conclusion:
This Pistachio Pudding is more than just a dessert; it’s a delightful experience for your taste buds. It’s affordable, looks professional, and tastes like it’s straight from a high-end cafe. Try this recipe today and impress your family and friends!
If you loved this Pistachio Pudding Recipe, please share it with your foodie friends! 🍰
Pistachio Pudding Recipe
ರುಚಿಕರವಾದ ಪಿಸ್ತಾ ಪುಡಿಂಗ್: ಮನೆಯಲ್ಲೇ ಮಾಡುವ ಸುಲಭ ವಿಧಾನ ಮತ್ತು ಸಂಪೂರ್ಣ ಮಾಹಿತಿ
ಸಿಹಿ ತಿಂಡಿಗಳು ಅಂದ ಕೂಡಲೇ ನೆನಪಾಗುವುದು ಚಾಕೊಲೇಟ್ ಅಥವಾ ವೆನಿಲ್ಲಾ. ಆದರೆ ಇತ್ತೀಚಿನ ದಿನಗಳಲ್ಲಿ ಜನರು ವಿಭಿನ್ನವಾದ ರುಚಿಯನ್ನು ಬಯಸುತ್ತಿದ್ದಾರೆ. ಅಂತಹ ವಿಭಿನ್ನ ಮತ್ತು ಪ್ರೀಮಿಯಂ ರುಚಿ ನೀಡುವ ಸಿಹಿ ಪದಾರ್ಥವೆಂದರೆ ಪಿಸ್ತಾ ಪುಡಿಂಗ್. ಇದರ ತಿಳಿ ಹಸಿರು ಬಣ್ಣ ಮತ್ತು ಪಿಸ್ತಾದ ಶ್ರೀಮಂತ ರುಚಿ ಹಬ್ಬದ ದಿನಗಳಿಗೆ ಅಥವಾ ವಿಶೇಷ ಸಮಾರಂಭಗಳಿಗೆ ಹೇಳಿ ಮಾಡಿಸಿದಂತಿದೆ.
ಈ ಲೇಖನದಲ್ಲಿ ನಾವು ಅತ್ಯಂತ ಸುಲಭವಾಗಿ, ಕಡಿಮೆ ಸಾಮಗ್ರಿಗಳನ್ನು ಬಳಸಿ ಹೇಗೆ ಅದ್ಭುತವಾದ ಪಿಸ್ತಾ ಪುಡಿಂಗ್ ಮಾಡಬಹುದು ಎಂಬುದನ್ನು ತಿಳಿಯೋಣ.
ಬೇಕಾಗುವ ಸಾಮಗ್ರಿಗಳು (Ingredients)
Pistachio Pudding Recipe
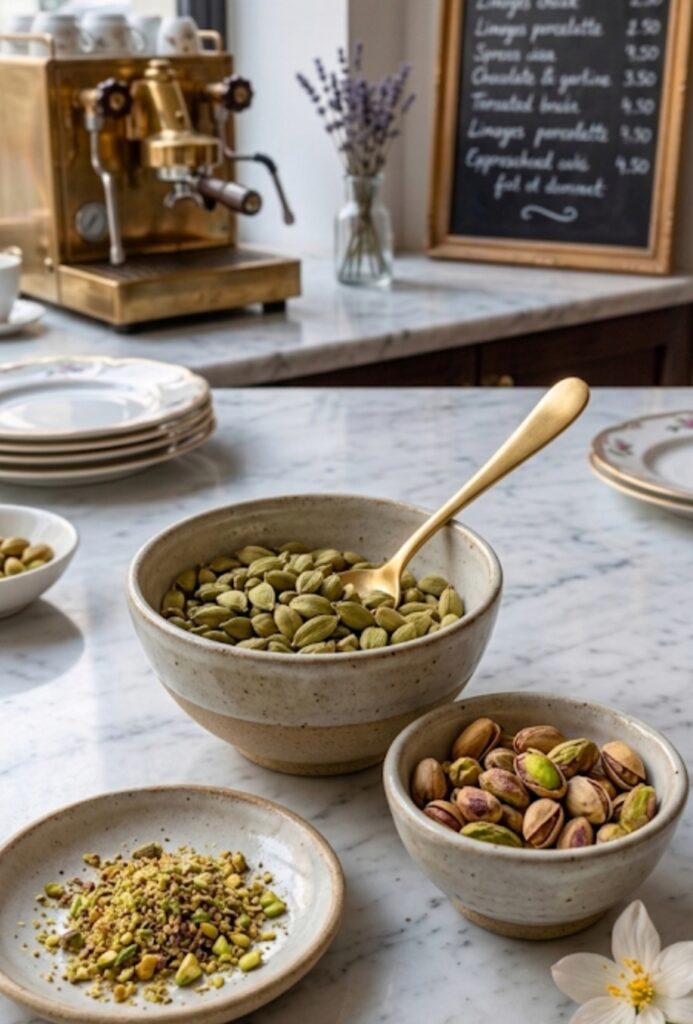
ಇದನ್ನು ಮಾಡಲು ನಿಮಗೆ ಯಾವುದೇ ಕಷ್ಟದ ಸಾಮಗ್ರಿಗಳು ಬೇಕಾಗಿಲ್ಲ. ಅಡುಗೆ ಮನೆಯಲ್ಲಿ ಸುಲಭವಾಗಿ ಸಿಗುವ ಪದಾರ್ಥಗಳೇ ಸಾಕು:
- ಹಾಲು: 500 ಮಿ.ಲೀ (ಪೂರ್ಣ ಕೆನೆಭರಿತ ಹಾಲು ಉತ್ತಮ)
- ಪಿಸ್ತಾ: ಅರ್ಧ ಕಪ್ (ನೆನೆಸಿ ಸಿಪ್ಪೆ ತೆಗೆದಿದ್ದು)
- ಸಕ್ಕರೆ: ಅರ್ಧ ಕಪ್ (ನಿಮ್ಮ ರುಚಿಗೆ ತಕ್ಕಂತೆ)
- ಕಾರ್ನ್ ಫ್ಲೋರ್: 3 ದೊಡ್ಡ ಚಮಚ (ಪುಡಿಂಗ್ ಗಟ್ಟಿಯಾಗಲು)
- ಏಲಕ್ಕಿ ಪುಡಿ: ಸ್ವಲ್ಪ (ಉತ್ತಮ ಪರಿಮಳಕ್ಕಾಗಿ)
- ಹಸಿರು ಆಹಾರದ ಬಣ್ಣ (Optional): ಒಂದು ಚಿಟಿಕೆ
- ಡ್ರೈ ಫ್ರೂಟ್ಸ್: ಅಲಂಕಾರಕ್ಕಾಗಿ (ಪಿಸ್ತಾ ಚೂರುಗಳು)
ಪಿಸ್ತಾ ಪುಡಿಂಗ್ ಮಾಡುವ ವಿಧಾನ (Step-by-Step Recipe)
Pistachio Pudding Https://my-dessertkitchen.com/chocolate-spread-cheesecake/ Recipe
ಹಂತ 1: ಪಿಸ್ತಾ ಪೇಸ್ಟ್ ತಯಾರಿಕೆ
ಮೊದಲು ಅರ್ಧ ಕಪ್ ಪಿಸ್ತಾವನ್ನು ಬಿಸಿ ನೀರಿನಲ್ಲಿ 15 ನಿಮಿಷ ನೆನೆಸಿಡಿ. ನಂತರ ಅದರ ಸಿಪ್ಪೆ ತೆಗೆದು, ಸ್ವಲ್ಪ ಹಾಲು ಸೇರಿಸಿ ಮಿಕ್ಸಿಯಲ್ಲಿ ನುಣ್ಣಗೆ ಪೇಸ್ಟ್ ಮಾಡಿಕೊಳ್ಳಿ. ಇದು ಪುಡಿಂಗ್ಗೆ ನೈಸರ್ಗಿಕ ಬಣ್ಣ ಮತ್ತು ರುಚಿ ನೀಡುತ್ತದೆ.
ಹಂತ 2: ಹಾಲನ್ನು ಕಾಯಿಸುವುದು
ಒಂದು ದಪ್ಪ ತಳದ ಪಾತ್ರೆಯಲ್ಲಿ ಹಾಲನ್ನು ಹಾಕಿ ಮಧ್ಯಮ ಉರಿಯಲ್ಲಿ ಕಾಯಿಸಿ. ಹಾಲು ಸ್ವಲ್ಪ ಬಿಸಿಯಾದ ನಂತರ ಅದಕ್ಕೆ ಸಕ್ಕರೆ ಸೇರಿಸಿ ಚೆನ್ನಾಗಿ ಕೈ ಆಡಿಸಿ.
ಹಂತ 3: ಪಿಸ್ತಾ ಮಿಶ್ರಣ ಸೇರಿಸುವುದು
ಹಾಲು ಕುದಿಯಲು ಪ್ರಾರಂಭಿಸಿದಾಗ, ನಾವು ಮೊದಲೇ ಸಿದ್ಧಪಡಿಸಿದ ಪಿಸ್ತಾ ಪೇಸ್ಟ್ ಅನ್ನು ಹಾಲಿಗೆ ಸೇರಿಸಿ. ಪಿಸ್ತಾದ ಹಸಿ ವಾಸನೆ ಹೋಗುವವರೆಗೆ 2-3 ನಿಮಿಷ ಕುದಿಸಿ.
ಹಂತ 4: ಕಾರ್ನ್ ಫ್ಲೋರ್ ಮಿಶ್ರಣ
ಒಂದು ಸಣ್ಣ ಬಟ್ಟಲಿನಲ್ಲಿ 3 ಚಮಚ ಕಾರ್ನ್ ಫ್ಲೋರ್ ತೆಗೆದುಕೊಂಡು, ಅದಕ್ಕೆ ಸ್ವಲ್ಪ ತಣ್ಣಗಿನ ಹಾಲು ಸೇರಿಸಿ ಗಂಟಿಲ್ಲದಂತೆ ಕಲಸಿಕೊಳ್ಳಿ. ಈಗ ಈ ಮಿಶ್ರಣವನ್ನು ಕುದಿಯುತ್ತಿರುವ ಹಾಲಿಗೆ ನಿಧಾನವಾಗಿ ಸುರಿಯುತ್ತಾ ಕೈ ಆಡಿಸುತ್ತಲೇ ಇರಿ. ಹಾಲು ತಕ್ಷಣವೇ ಗಟ್ಟಿಯಾಗಲು ಶುರುವಾಗುತ್ತದೆ.
ಹಂತ 5: ಫಿನಿಶಿಂಗ್ ಟಚ್
ಮಿಶ್ರಣವು ಸರಿಯಾದ ಹದಕ್ಕೆ (ಕ್ರೇಮ್ ತರಹ) ಬಂದಾಗ ಏಲಕ್ಕಿ ಪುಡಿ ಸೇರಿಸಿ ಒಲೆಯನ್ನು ಆರಿಸಿ. ಇದು ತಣ್ಣಗಾದ ಮೇಲೆ ಇನ್ನೂ ಸ್ವಲ್ಪ ಗಟ್ಟಿಯಾಗುತ್ತದೆ.
ಹಂತ 6: ಸೆಟ್ ಮಾಡುವುದು ಮತ್ತು ಅಲಂಕಾರ
ತಯಾರಾದ ಪುಡಿಂಗ್ ಅನ್ನು ಸಣ್ಣ ಬೌಲ್ಗಳಿಗೆ ಅಥವಾ ಗಾಜಿನ ಲೋಟಕ್ಕೆ ಹಾಕಿ. ಇದರ ಮೇಲೆ ಕತ್ತರಿಸಿದ ಪಿಸ್ತಾ ಮತ್ತು ಬಾದಾಮಿ ಚೂರುಗಳನ್ನು ಉದುರಿಸಿ. ಇದನ್ನು ಕನಿಷ್ಠ 2-3 ಗಂಟೆಗಳ ಕಾಲ ಫ್ರಿಡ್ಜ್ನಲ್ಲಿ ಇಟ್ಟು ತಣ್ಣಗಾದ ಮೇಲೆ ಸವಿಯಿರಿ.
ಪಿಸ್ತಾ ಪುಡಿಂಗ್ನ ಅನುಕೂಲಗಳು (Positive Aspects)
Pistachio Pudding Recipe
- ಆರೋಗ್ಯಕರ ಆಯ್ಕೆ: ಪಿಸ್ತಾದಲ್ಲಿ ಪ್ರೋಟೀನ್, ಫೈಬರ್ ಮತ್ತು ಆಂಟಿ-ಆಕ್ಸಿಡೆಂಟ್ಗಳು ಹೇರಳವಾಗಿವೆ. ಇದು ಕೇವಲ ಸಿಹಿಯಲ್ಲ, ಆರೋಗ್ಯಕ್ಕೂ ಒಳ್ಳೆಯದು.
- ಸುಲಭ ತಯಾರಿಕೆ: ಯಾವುದೇ ಬೇಕಿಂಗ್ ಓವನ್ ಅಥವಾ ಹೆಚ್ಚಿನ ಪರಿಕರಗಳ ಅಗತ್ಯವಿಲ್ಲದೆ ಕೇವಲ 20 ನಿಮಿಷದಲ್ಲಿ ಇದನ್ನು ಸಿದ್ಧಪಡಿಸಬಹುದು.
- ಮಕ್ಕಳಿಗೆ ಇಷ್ಟವಾಗುತ್ತದೆ: ಇದರ ಆಕರ್ಷಕ ಹಸಿರು ಬಣ್ಣ ಮತ್ತು ಕ್ರೀಮಿ ಟೆಕ್ಸ್ಚರ್ ಮಕ್ಕಳಿಗೆ ತುಂಬಾ ಇಷ್ಟವಾಗುತ್ತದೆ.
- ಪಾರ್ಟಿಗಳಿಗೆ ಬೆಸ್ಟ್: ಮನೆಯಲ್ಲಿ ಚಿಕ್ಕ ಪುಟ್ಟ ಫಂಕ್ಷನ್ ಇದ್ದಾಗ ಇದನ್ನು ಮೊದಲೇ ಮಾಡಿ ಫ್ರಿಡ್ಜ್ನಲ್ಲಿ ಇಡಬಹುದು, ಇದರಿಂದ ಸಮಯ ಉಳಿತಾಯವಾಗುತ್ತದೆ.
ಗಮನಿಸಬೇಕಾದ ಅಂಶಗಳು (Negative/Challenging Aspects)
- ಕ್ಯಾಲೋರಿ ಪ್ರಮಾಣ: ಇದರಲ್ಲಿ ಸಕ್ಕರೆ ಮತ್ತು ಫುಲ್ ಕ್ರೀಮ್ ಹಾಲು ಬಳಸುವುದರಿಂದ ಕ್ಯಾಲೋರಿ ಸ್ವಲ್ಪ ಹೆಚ್ಚಿರುತ್ತದೆ. ಡಯಟ್ ಮಾಡುವವರು ಸಕ್ಕರೆ ಬದಲು ಬೆಲ್ಲ ಅಥವಾ ಜೇನುತುಪ್ಪ ಬಳಸಬಹುದು.
- ಗಂಟಾಗುವ ಸಾಧ್ಯತೆ: ಕಾರ್ನ್ ಫ್ಲೋರ್ ಹಾಕುವಾಗ ಸರಿಯಾಗಿ ಕೈ ಆಡಿಸದಿದ್ದರೆ ಗಂಟಾಗಬಹುದು. ಆದ್ದರಿಂದ ನಿರಂತರವಾಗಿ ಕಲಸುತ್ತಿರಬೇಕು.
- ಶೇಖರಣೆ: ಇದನ್ನು ಫ್ರಿಡ್ಜ್ ಹೊರಗೆ ಹೆಚ್ಚು ಹೊತ್ತು ಇಡಲು ಬರುವುದಿಲ್ಲ, ಹಾಲು ಇರುವುದರಿಂದ ಬೇಗ ಕೆಡುವ ಸಾಧ್ಯತೆ ಇರುತ್ತದೆ.
ಉತ್ತಮ ಮತ್ತು ಸುಲಭ ಪದಗಳ ಬಳಕೆ (Tips for Best Results)
Pistachio Pudding Recipe
ನಿಮ್ಮ ಬ್ಲಾಗ್ ಓದುಗರಿಗೆ ಈ ಕೆಳಗಿನ ಟಿಪ್ಸ್ ನೀಡುವುದರಿಂದ ಲೇಖನ ಇನ್ನಷ್ಟು ಆಪ್ತವಾಗುತ್ತದೆ:
- ತಾಜಾ ಪಿಸ್ತಾ ಬಳಸಿ: ಹಳೆಯ ಪಿಸ್ತಾ ಬಳಸಿದರೆ ರುಚಿ ಕಹಿಯಾಗಬಹುದು, ಆದ್ದರಿಂದ ತಾಜಾ ಪಿಸ್ತಾ ಬಳಸುವುದು ಉತ್ತಮ.
- ಕೇಸರಿ ಬಳಕೆ: ಪಿಸ್ತಾದ ಜೊತೆಗೆ ಸ್ವಲ್ಪ ಕೇಸರಿ ದಳಗಳನ್ನು ಸೇರಿಸಿದರೆ ರಾಜಮನೆತನದ ರುಚಿ ಸಿಗುತ್ತದೆ.
- ಸಕ್ಕರೆ ಬದಲು ಕಂಡೆನ್ಸ್ಡ್ ಮಿಲ್ಕ್: ನೀವು ಇನ್ನೂ ಹೆಚ್ಚಿನ ಕ್ರೀಮಿ ರುಚಿ ಬಯಸುವುದಾದರೆ ಸಕ್ಕರೆಯ ಬದಲಿಗೆ ಕಂಡೆನ್ಸ್ಡ್ ಮಿಲ್ಕ್ ಬಳಸಬಹುದು.
ತೀರ್ಮಾನ:
ಈ ಪಿಸ್ತಾ ಪುಡಿಂಗ್ ಕೇವಲ ಒಂದು ಸಿಹಿ ತಿನಿಸಲ್ಲ, ಇದು ನಿಮ್ಮ ಅಡುಗೆಯ ಕೌಶಲ್ಯವನ್ನು ಮೆರುಗುಗೊಳಿಸುವ ಒಂದು ಸುಂದರ ಆಯ್ಕೆ. ಅತಿ ಕಡಿಮೆ ಖರ್ಚಿನಲ್ಲಿ ಹೋಟೆಲ್ ಶೈಲಿಯ ಡೆಸರ್ಟ್ ಮನೆಯಲ್ಲೇ ಸವಿಯಲು ಇಂದು ಈ ರೆಸಿಪಿಯನ್ನು ಪ್ರಯತ್ನಿಸಿ!
Pistachio https://en.wikipedia.org/wiki/Pistachio Pudding Recipe
ಈ ರೆಸಿಪಿ ನಿಮಗೆ ಇಷ್ಟವಾದಲ್ಲಿ, ನಿಮ್ಮ ಸ್ನೇಹಿತರು ಮತ್ತು ಕುಟುಂಬದವರೊಂದಿಗೆ ಶೇರ್ ಮಾಡಲು ಮರೆಯಬೇಡಿ! ನಿಮ್ಮ ಅನಿಸಿಕೆಗಳನ್ನು ಕಮೆಂಟ್ ಮೂಲಕ ನಮಗೆ ತಿಳಿಸಿ.”