
“Learn how to make the best Chocolate Spread Cheesecake at home with this easy recipe…”
chocolate-spread-cheesecake
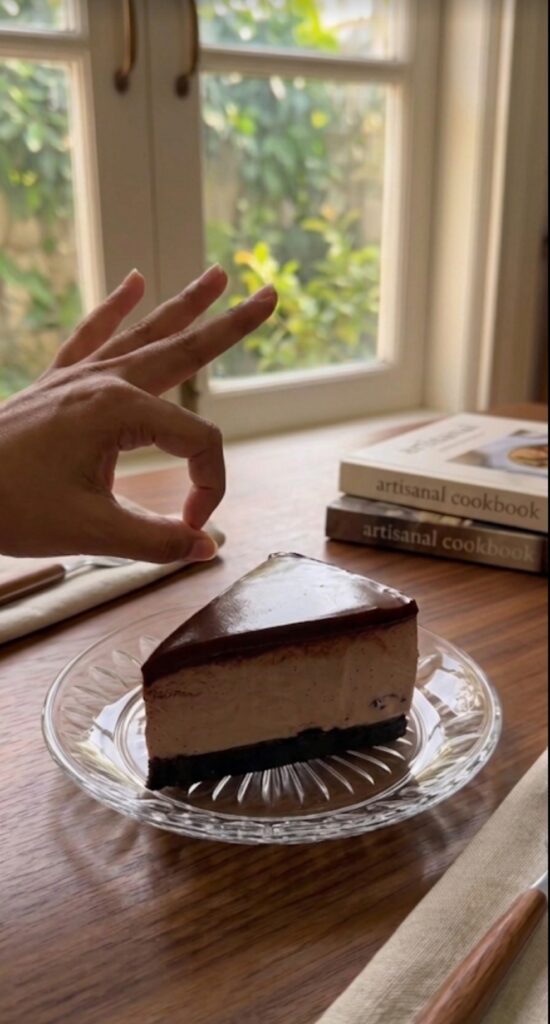
The Ultimate No-Bake Chocolate Spread Cheesecake: A Heavenly Delight
Chocolate Spread Cheesecake
Who doesn’t love a rich, creamy, and chocolatey dessert? If you are looking for a show-stopper cake that requires zero baking, you have come to the right place. This Chocolate Spread Cheesecake is the perfect blend of crunchy biscuit base and silky smooth chocolate cream.
In this blog, we will walk through the easy steps to make it, and honestly discuss the positives and negatives of this indulgent treat.
🎂 The Recipe
Ingredients You’ll Need:
- The Base: 200g chocolate biscuits (like Oreos or Digestives) and 50g melted unsalted butter.
- The Filling: 400g full-fat cream cheese, 200g chocolate hazelnut spread (like Nutella), 100g powdered sugar, and 200ml heavy whipping cream.
- The Topping: Extra chocolate spread for the glaze, toasted hazelnuts, or a side of dry fruits.
Step-by-Step Instructions:
Chocolate Spread Https://my-dessertkitchen.com/homemade-nutty-chocolate/ Cheesecake
- Prepare the Crust: Crush the biscuits into a fine sand-like texture using a blender. Mix in the melted butter until it feels like wet sand. Press this mixture firmly into the bottom of a 7-inch cake tin. Pro tip: Use the bottom of a glass to get an even, flat surface. Chill in the fridge for 30 minutes.
- Whisk the Cheese: In a large bowl, beat the cream cheese and powdered sugar until smooth and airy. Fold in the chocolate spread and mix until the color is consistent.
- Whip the Cream: In a separate chilled bowl, whip the heavy cream until stiff peaks form. Gently fold this into the chocolate-cheese mixture. Avoid over-mixing, as we want to keep it light.
- Set the Cake: Pour the filling over the chilled biscuit base. Smooth the top with a spatula.
- The Wait: Cover the tin with plastic wrap and refrigerate for at least 6 to 8 hours (ideally overnight).
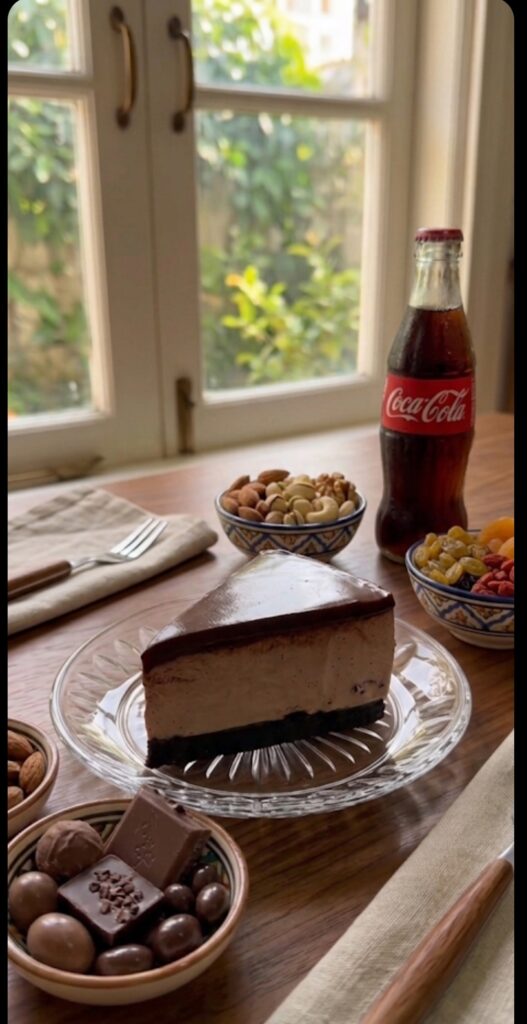
- Serve: Once set, remove from the tin, drizzle some extra chocolate on top, and serve with a glass of chilled Coca-Cola or a bowl of crunchy dry fruits.
✅ The Positives (Why You’ll Love It)
Chocolate Spread Cheesecake
1. Beginner Friendly
The biggest positive of this recipe is that it is incredibly easy. Since there is no oven involved, you don’t have to worry about the cake sinking or burning. It is a foolproof recipe for new bakers.
2. Luxurious Texture
The combination of cream cheese and chocolate spread creates a texture that is “melt-in-your-mouth” soft. It feels like a high-end dessert from a 5-star hotel, making it the best choice for special occasions.
3. Customizable
You can easily swap ingredients. Don’t like hazelnuts? Use a plain chocolate spread. Want more crunch? Add chopped dry fruits into the filling. It’s a very flexible recipe.
4. Great for Hosting
Because you make it a day in advance, it takes the stress out of hosting a party. You just take it out of the fridge and it’s ready to serve!
❌ The Negatives (Things to Keep in Mind)
Chocolate Spread Cheesecake
. High Calorie Count
On the negative side, this is a very heavy dessert. With cream cheese, butter, and sugar, it is packed with calories. It is definitely a “cheat meal” and not something you can eat every day if you are watching your health.
2. The Long Wait
The most annoying part of this recipe is the setting time. You cannot eat it immediately. If you try to cut it too soon, it will be a runny mess rather than a firm slice. Patience is a must!
3. Expensive Ingredients
Quality cream cheese and premium chocolate spreads can be a bit pricey. Compared to a simple sponge cake, the cost of making a cheesecake is significantly higher.
4. Temperature Sensitive
Unlike a baked cake, this cheesecake cannot sit out on a table for hours, especially in warm weather. It will start to soften and lose its shape, so it must stay refrigerated until the very last moment.
💡 Final Verdict
Chocolate Spread https://en.wikipedia.org/wiki/Chocolate Cheesecake
Is it worth it? Absolutely. While the high calories and the wait time are slight negatives, the incredible taste and the “wow” factor more than make up for it. Pairing a slice of this rich cake with the fizz of a Coca-Cola creates a contrast that many find refreshing.
If you want to impress your friends or simply treat yourself after a long week, this Chocolate Spread Cheesecake is the perfect easy recipe to try today.
Happy Eating!
🎂 ಚಾಕೊಲೇಟ್ ಸ್ಪ್ರೆಡ್ ಚೀಸ್ಕೇಕ್ ರೆಸಿಪಿ
ಈ ಕೇಕ್ ತಯಾರಿಸಲು ನಿಮಗೆ ಓವನ್ (Oven) ಅಗತ್ಯವಿಲ್ಲ. ಇದು ‘ನೋ-ಬೇಕ್’ (No-Bake) ಮಾದರಿಯಾಗಿದ್ದು, ಯಾರು ಬೇಕಾದರೂ ಸುಲಭವಾಗಿ ಮಾಡಬಹುದು.
Chocolate Spread Cheesecake
ಅಗತ್ಯವಿರುವ ಸಾಮಗ್ರಿಗಳು:
- ಬೇಸ್ (ತಳಭಾಗ) ಗಾಗಿ: 200 ಗ್ರಾಂ ಚಾಕೊಲೇಟ್ ಬಿಸ್ಕತ್ತುಗಳು (ಓರಿಯೋ ಅಥವಾ ಯಾವುದೇ ಡಾರ್ಕ್ ಬಿಸ್ಕತ್ತು) ಮತ್ತು 50 ಗ್ರಾಂ ಕರಗಿಸಿದ ಬೆಣ್ಣೆ.
- ಫಿಲ್ಲಿಂಗ್ (ಮಧ್ಯಭಾಗ) ಗಾಗಿ: 400 ಗ್ರಾಂ ಕ್ರೀಮ್ ಚೀಸ್, 200 ಗ್ರಾಂ ಚಾಕೊಲೇಟ್ ಸ್ಪ್ರೆಡ್ (ನಟೆಲ್ಲಾ ಅಥವಾ ಸಾದಾ), 100 ಗ್ರಾಂ ಸಕ್ಕರೆ ಪುಡಿ ಮತ್ತು 200 ಮಿಲಿ ವಿಪ್ಪಿಂಗ್ ಕ್ರೀಮ್.
- ಗಾರ್ನಿಶ್ ಗಾಗಿ: ಡ್ರೈ ಫ್ರೂಟ್ಸ್, ಚಾಕೊಲೇಟ್ ತುರಿ ಅಥವಾ ಕೋಕಾ-ಕೋಲಾ ಜೊತೆಗೆ ಸವಿಯಲು ಸಿದ್ಧತೆ.
ತಯಾರಿಸುವ ವಿಧಾನ:
Chocolate Spread Cheesecake
- ಬಿಸ್ಕತ್ತು ಪುಡಿ ಮಾಡಿ: ಮೊದಲು ಬಿಸ್ಕತ್ತುಗಳನ್ನು ಮಿಕ್ಸಿಯಲ್ಲಿ ನುಣ್ಣಗೆ ಪುಡಿ ಮಾಡಿಕೊಳ್ಳಿ. ಅದಕ್ಕೆ ಕರಗಿದ ಬೆಣ್ಣೆಯನ್ನು ಸೇರಿಸಿ ಚೆನ್ನಾಗಿ ಬೆರೆಸಿ.
- ಬೇಸ್ ಸೆಟ್ ಮಾಡಿ: ಒಂದು ಕೇಕ್ ಪ್ಯಾನ್ ತಳಕ್ಕೆ ಈ ಮಿಶ್ರಣವನ್ನು ಹಾಕಿ ಗಟ್ಟಿಯಾಗಿ ಒತ್ತಿ. ಇದನ್ನು 30 ನಿಮಿಷ ಫ್ರಿಜ್ನಲ್ಲಿ ಇಡಿ.
- ಕ್ರೀಮ್ ಸಿದ್ಧಪಡಿಸಿ: ಒಂದು ಪಾತ್ರೆಯಲ್ಲಿ ಕ್ರೀಮ್ ಚೀಸ್ ಮತ್ತು ಸಕ್ಕರೆ ಪುಡಿಯನ್ನು ಹಾಕಿ ಮೃದುವಾಗುವವರೆಗೆ ಮಿಕ್ಸ್ ಮಾಡಿ. ನಂತರ ಅದಕ್ಕೆ ಚಾಕೊಲೇಟ್ ಸ್ಪ್ರೆಡ್ ಸೇರಿಸಿ.
- ವಿಪ್ಪಿಂಗ್ ಕ್ರೀಮ್: ಇನ್ನೊಂದು ಪಾತ್ರೆಯಲ್ಲಿ ವಿಪ್ಪಿಂಗ್ ಕ್ರೀಮ್ ಅನ್ನು ಗಟ್ಟಿಯಾಗುವವರೆಗೆ ಬೀಟ್ ಮಾಡಿ, ನಂತರ ಇದನ್ನು ಚೀಸ್ ಮಿಶ್ರಣಕ್ಕೆ ಸಾಫ್ಟ್ ಆಗಿ ಬೆರೆಸಿ.
- ಫ್ರೀಜ್ ಮಾಡಿ: ಸಿದ್ಧವಾದ ಕ್ರೀಮ್ ಅನ್ನು ಬಿಸ್ಕತ್ತು ಬೇಸ್ ಮೇಲೆ ಸುರಿದು ಸಮನಾಗಿ ಹರಡಿ. ಇದನ್ನು ಕನಿಷ್ಠ 6 ರಿಂದ 8 ಗಂಟೆಗಳ ಕಾಲ ಫ್ರಿಜ್ನಲ್ಲಿ ಇರಿಸಬೇಕು.
🌟 ಪಾಸಿಟಿವ್ ಅಂಶಗಳು (ಧನಾತ್ಮಕ ಗುಣಗಳು)
- ರುಚಿಯ ರಾಜ: ಚಾಕೊಲೇಟ್ ಮತ್ತು ಚೀಸ್ ಸಂಗಮ ಅತೀವವಾದ ರುಚಿಯನ್ನು ನೀಡುತ್ತದೆ. ಪ್ರತಿ ತುತ್ತಿನಲ್ಲೂ ಸ್ವರ್ಗೀಯ ಅನುಭವವಾಗುವುದು ಗ್ಯಾರಂಟಿ!
- ಸುಲಭ ವಿಧಾನ: ಓವನ್ ಇಲ್ಲದೆ ಮಾಡಬಹುದಾದ್ದರಿಂದ ಅಡುಗೆಯಲ್ಲಿ ಹೊಸಬರಿಗೂ ಇದು ಬೆಸ್ಟ್ ಆಪ್ಷನ್.
- ಆಕರ್ಷಕ ನೋಟ: ಮೇಲೆ ಚಾಕೊಲೇಟ್ ಲೇಯರ್ ಇರುವುದರಿಂದ ಇದು ನೋಡಲು ತುಂಬಾ ಪ್ರೀಮಿಯಂ ಆಗಿ ಕಾಣುತ್ತದೆ. ಪಾರ್ಟಿಗಳಿಗೆ ಇದು ಸೂಕ್ತ.
- ಮಕ್ಕಳ ಫೇವರೆಟ್: ಡ್ರೈ ಫ್ರೂಟ್ಸ್ ಮತ್ತು ಚಾಕೊಲೇಟ್ ಇರುವುದರಿಂದ ಮಕ್ಕಳು ಇದನ್ನು ಬಹಳ ಇಷ್ಟಪಟ್ಟು ತಿನ್ನುತ್ತಾರೆ.
⚠️ ನೆಗೆಟಿವ್ ಅಂಶಗಳು (ಗಮನಿಸಬೇಕಾದ ಸಂಗತಿಗಳು)
Chocolate Spread Cheesecake
- ಕ್ಯಾಲೋರಿ ಹೆಚ್ಚು: ಇದರಲ್ಲಿ ಸಕ್ಕರೆ, ಬೆಣ್ಣೆ ಮತ್ತು ಚೀಸ್ ಹೇರಳವಾಗಿರುವುದರಿಂದ ಆರೋಗ್ಯದ ದೃಷ್ಟಿಯಿಂದ ಇದು ಸ್ವಲ್ಪ ಭಾರೀ ಆಹಾರ. ಡಯಟ್ ಮಾಡುವವರಿಗೆ ಇದು ಸೂಕ್ತವಲ್ಲ.
- ಸಮಯದ ಅವಶ್ಯಕತೆ: ಇದನ್ನು ತಿನ್ನಲು ಕಾಯಬೇಕು! ರೆಸಿಪಿ ಸುಲಭವಾದರೂ, ಇದು ಸೆಟ್ ಆಗಲು ಕನಿಷ್ಠ 6 ಗಂಟೆ ಬೇಕು. ತಕ್ಷಣ ತಿನ್ನಲು ಸಾಧ್ಯವಿಲ್ಲ ಎಂಬುದು ಬೇಸರದ ಸಂಗತಿ.
- ವೆಚ್ಚ: ಕ್ರೀಮ್ ಚೀಸ್ ಮತ್ತು ಒಳ್ಳೆಯ ಚಾಕೊಲೇಟ್ ಸ್ಪ್ರೆಡ್ ಬೆಲೆ ಸ್ವಲ್ಪ ತುಟ್ಟಿ ಇರುತ್ತದೆ. ಸಾಮಾನ್ಯ ಕೇಕ್ಗಳಿಗಿಂತ ಇದಕ್ಕೆ ಖರ್ಚು ಹೆಚ್ಚು.
💡 ಕೊನೆಯ ಮಾತು (Best Advice)
ನೀವು ಈ ಚೀಸ್ಕೇಕ್ ಸವಿಯುವಾಗ ಪಕ್ಕದಲ್ಲಿ ತಣ್ಣನೆಯ ಕೋಕಾ-ಕೋಲಾ ಅಥವಾ ಸ್ವಲ್ಪ ಡ್ರೈ ಫ್ರೂಟ್ಸ್ ಇಟ್ಟುಕೊಂಡರೆ ಅದರ ಮಜವೇ ಬೇರೆ. ಆದರೆ ನೆನಪಿರಲಿ, ಅತಿಯಾದ ಸಿಹಿ ಆರೋಗ್ಯಕ್ಕೆ ಒಳ್ಳೆಯದಲ್ಲ, ಹಾಗಾಗಿ ಮಿತವಾಗಿ ಸವಿಯಿರಿ.
ನಿಮ್ಮ ಈ ಹೋಮ್-ಮೇಡ್ ಚೀಸ್ಕೇಕ್ ಹೋಟೆಲ್ ಶೈಲಿಯಲ್ಲೇ ಮೂಡಿಬರುತ್ತದೆ. ಇಂದೇ ಪ್ರಯತ್ನಿಸಿ ನೋಡಿ!
Chocolate Spread Cheesecake
ಹಲೋ ಫ್ರೆಂಡ್ಸ್! ಇವತ್ತು ನಾನು ಅತ್ಯಂತ ಸುಲಭವಾದ ಮತ್ತು ರುಚಿಕರವಾದ No-Bake Chocolate Spread Cheesecake ರೆಸಿಪಿಯನ್ನು ನಿಮ್ಮೊಂದಿಗೆ ಹಂಚಿಕೊಳ್ಳುತ್ತಿದ್ದೇನೆ. ವಿಶೇಷವೆಂದರೆ ಇದನ್ನು ಮಾಡಲು ಓವನ್ ಅಗತ್ಯವಿಲ್ಲ! 🎂🍫
ಪೂರ್ಣ ವಿವರಗಳಿಗಾಗಿ ಇಲ್ಲಿ ಕ್ಲಿಕ್ ಮಾಡಿ:
[ನಿಮ್ಮ ವೆಬ್ಸೈಟ್ ಲಿಂಕ್ ಇಲ್ಲಿ ಹಾಕಿ]”