
Quick strawberry mousse in a glass
“Learn how to make a delicious and easy Eggless Strawberry Layered Tiramisu at home. This No-bake strawberry dessert is perfect for summer and looks stunning in glass cups!”
No-Bake Strawberry Cake
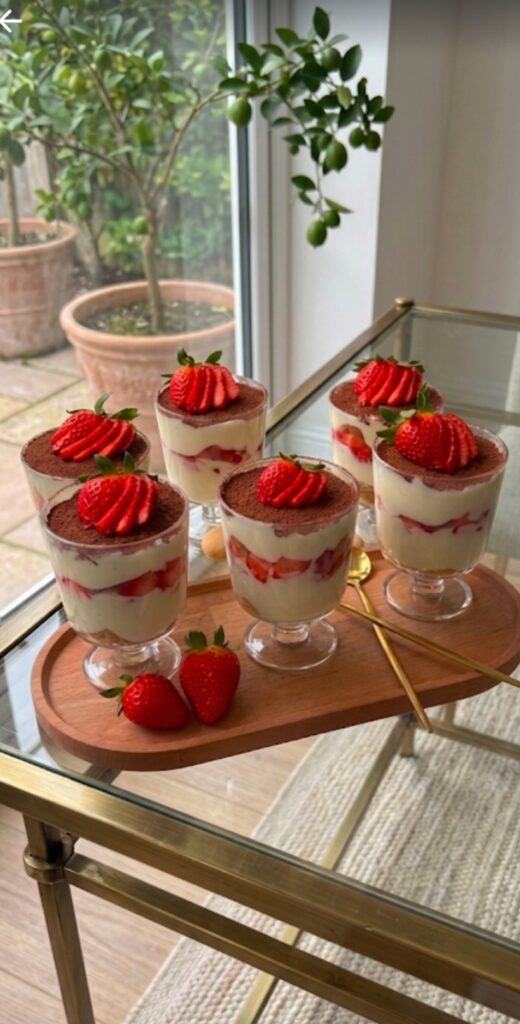
If you are looking for a dessert that is as stunning to look at as it is delicious to eat, this Strawberry Layered Tiramisu is the perfect pick. Unlike the traditional coffee-flavored version, this recipe celebrates the freshness of strawberries and the richness of cream. It’s no-bake, eggless, and perfect for any occasion!
Eggless Strawberry https://my-dessertkitchen.com/no-bake-coffee-cheesecake/” Dessert
Ingredients
For the Strawberry Base:
- Fresh Strawberries: 250g (hulled and sliced)
- Granulated Sugar: 2 tablespoons
- Lemon Juice: 1 teaspoon
For the Cream Filling:
- Mascarpone Cheese: 250g (or softened cream cheese)
- Whipping Cream: 200ml (chilled)
- Powdered Sugar: ½ cup
- Vanilla Extract: 1 teaspoon
For the Assembly:
- Ladyfinger Biscuits or Sponge Cake: 10-12 pieces
- Milk or Strawberry Juice: For soaking the biscuits
- Cocoa Powder: For dusting on top
Instructions
Easy dessert recipes for beginners
Step 1: Prep the Strawberries
In a small bowl, combine the sliced strawberries with sugar and lemon juice. Let them sit for about 15-20 minutes. This process (macerating) helps the strawberries release their natural juices, creating a beautiful syrup.
Step 2: Whip the Cream
In a chilled bowl, whip the heavy whipping cream using an electric mixer until it forms stiff peaks. In another bowl, whisk together the mascarpone cheese, powdered sugar, and vanilla extract until smooth. Gently fold the whipped cream into the mascarpone mixture. Keep it light and airy!
Step 3: The Layering Process
Take individual glass cups or a large dessert bowl to start the layers:
- The Base: Briefly dip the biscuits or cake pieces into the milk/juice and place them at the bottom of the glass.
- The Cream: Add a generous layer of the prepared cream mixture over the base.
- The Fruit: Add a layer of the macerated strawberries. For a professional look, press the slices against the sides of the glass.
- Final Layer: Top it off with another layer of cream and smooth the surface.
Step 4: Garnish and Chill
Easy Strawberry Layered Tiramisu”
Lightly dust the top with cocoa powder using a fine mesh strainer. Garnish with a whole strawberry or a mint leaf.
Pro Tip: For the best flavor and texture, refrigerate the dessert for at least 4 to 6 hours (or overnight). This allows the flavors to meld and the layers to set perfectly.
Why This Recipe Works for Your Blog?
Easy Strawberry Layered Tiramisu” ಅ
- Visual Appeal: The vibrant red of the strawberries against the white cream looks incredible on glass tables and in natural lighting.
- Beginner Friendly: No baking involved! It’s a great “how-to” for your readers who are just starting their dessert journey.
- Keywords for SEO: Make sure to use terms like “No-bake Strawberry Dessert,” “Eggless Tiramisu,” and “Easy Summer Treats” to help your blog rank better on Google Search Console.
- Strawberry Layered Parfait
Enjoy making this beauty for your “My Dessert Kitchen” blog!
In English (Conclusion):
Eggless Strawberry https://en.wikipedia.org/wiki/TiramisuTiramisuvc vbh
Final Thoughts:
This Strawberry Layered Tiramisu is more than just a dessert; it’s a treat for both your eyes and your taste buds. Its elegant look makes it perfect for dinner parties, yet it’s simple enough for a mid-week craving.
Give this recipe a try and let me know how it turned out in the comments below! Don’t forget to subscribe to “My Dessert Kitchen” for more delightful treats, and share this post with your fellow dessert lovers.
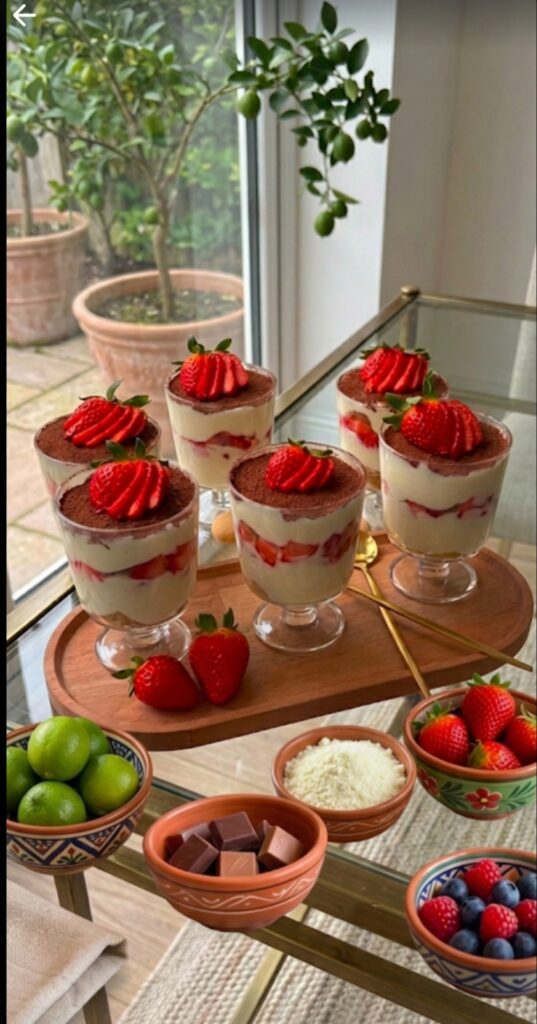
ಸ್ಟ್ರಾಬೆರಿ ಲೇಯರ್ಡ್ ಟಿರಾಮಿಸು (Strawberry Layered Tiramisu)
Eggless Strawberry Tiramisu
ಸ್ಟ್ರಾಬೆರಿ ರೆಸಿಪಿ (Strawberry Recipe)
ಸಿಹಿ ತಿಂಡಿಗಳ ಲೋಕದಲ್ಲಿ ಟಿರಾಮಿಸು ಯಾವಾಗಲೂ ರಾಜನಿದ್ದಂತೆ. ಸಾಮಾನ್ಯವಾಗಿ ಇದನ್ನು ಕಾಫಿ ಫ್ಲೇವರ್ನಲ್ಲಿ ಮಾಡಲಾಗುತ್ತದೆ. ಆದರೆ ಇಂದು ನಾವು ತಾಜಾ ಸ್ಟ್ರಾಬೆರಿಗಳನ್ನು ಬಳಸಿ, ಯಾವುದೇ ಅಂಡೆ (Eggless) ಬಳಸದೆ, ಸುಲಭವಾಗಿ ಮನೆಯಲ್ಲೇ ಮಾಡಬಹುದಾದ ‘ಸ್ಟ್ರಾಬೆರಿ ಟಿರಾಮಿಸು’ ಬಗ್ಗೆ ತಿಳಿಯೋಣ. ಇದು ನೋಡಲು ಎಷ್ಟು ಸುಂದರವೋ, ಸವಿಯಲು ಅಷ್ಟೇ ಅದ್ಭುತ.
ಸ್ಟ್ರಾಬೆರಿ ಟಿರಾಮಿಸು ಮಾಡುವ ವಿಧಾನ
ಬೇಕಾಗುವ ಸಾಮಗ್ರಿಗಳು:
ಸುಲಭವಾದ ಸಿಹಿ ತಿಂಡಿ (Easy Sweet https://my-dessertkitchen.com/easy-strawberry-layered-tiramisu Recipe)
ಸ್ಟ್ರಾಬೆರಿ ಮಿಶ್ರಣಕ್ಕೆ:
- ತಾಜಾ ಸ್ಟ್ರಾಬೆರಿ: 1 ಕಪ್ (ಚಿಕ್ಕದಾಗಿ ಕತ್ತರಿಸಿದ್ದು)
- ಸಕ್ಕರೆ: 2 ಚಮಚ
- ಲಿಂಬೆ ರಸ: 1 ಚಮಚ
ಕ್ರೀಮ್ ಲೇಯರ್ಗೆ:
- ಮಸ್ಕಾರ್ಪೋನ್ ಚೀಸ್: 1 ಕಪ್ (ಅಥವಾ ಸಾಫ್ಟ್ ಕ್ರೀಮ್ ಚೀಸ್)
- ವಿಪ್ಪಿಂಗ್ ಕ್ರೀಮ್: 1 ಕಪ್
- ಪೌಡರ್ ಶುಗರ್: ½ ಕಪ್
- ವೆನಿಲ್ಲಾ ಎಸೆನ್ಸ್: 1 ಚಮಚ
ಬೇಸ್ ಮಾಡಲು:
- ಬಿಸ್ಕೆಟ್ ಅಥವಾ ಸ್ಪಾಂಜ್ ಕೇಕ್: 8-10 ತುಂಡುಗಳು (ಲೇಡಿ ಫಿಂಗರ್ ಬಿಸ್ಕೆಟ್ ಸಿಕ್ಕರೆ ಉತ್ತಮ)
- ಹಾಲಿನ ಮಿಶ್ರಣ ಅಥವಾ ಸ್ಟ್ರಾಬೆರಿ ಸಿರಪ್: ಬಿಸ್ಕೆಟ್ ನೆನೆಸಲು
ತಯಾರಿಸುವ ಹಂತಗಳು:
1. ಸ್ಟ್ರಾಬೆರಿ ತಯಾರಿ (Macerating Strawberries)
ಮೊದಲು ಕತ್ತರಿಸಿದ ಸ್ಟ್ರಾಬೆರಿಗಳನ್ನು ಒಂದು ಬೌಲ್ಗೆ ಹಾಕಿ, ಅದಕ್ಕೆ ಸಕ್ಕರೆ ಮತ್ತು ಲಿಂಬೆ ರಸ ಸೇರಿಸಿ ಮಿಶ್ರಣ ಮಾಡಿ. ಇದನ್ನು 20 ನಿಮಿಷ ಬಿಡಿ. ಇದರಿಂದ ಸ್ಟ್ರಾಬೆರಿ ಮೆತ್ತಗಾಗಿ, ತನ್ನ ನೈಸರ್ಗಿಕ ರಸವನ್ನು ಬಿಟ್ಟುಕೊಳ್ಳುತ್ತದೆ. ಇದು ಡೆಸರ್ಟ್ಗೆ ಅದ್ಭುತ ರುಚಿ ನೀಡುತ್ತದೆ.
2. ಫ್ಲಫಿ ಕ್ರೀಮ್ ತಯಾರಿ
ಒಂದು ದೊಡ್ಡ ಪಾತ್ರೆಯಲ್ಲಿ ತಣ್ಣಗಿರುವ ವಿಪ್ಪಿಂಗ್ ಕ್ರೀಮ್ ತೆಗೆದುಕೊಂಡು ಎಲೆಕ್ಟ್ರಿಕ್ ಬೀಟರ್ನಿಂದ ಬೀಟ್ ಮಾಡಿ. ಕ್ರೀಮ್ ಗಟ್ಟಿಯಾದ ಮೇಲೆ (Stiff Peaks), ಮತ್ತೊಂದು ಬೌಲ್ನಲ್ಲಿ ಮಸ್ಕಾರ್ಪೋನ್ ಚೀಸ್, ಸಕ್ಕರೆ ಪುಡಿ ಮತ್ತು ವೆನಿಲ್ಲಾ ಎಸೆನ್ಸ್ ಸೇರಿಸಿ ಮೃದುವಾಗಿ ಮಿಕ್ಸ್ ಮಾಡಿ. ಈಗ ವಿಪ್ಪಿಂಗ್ ಕ್ರೀಮ್ ಅನ್ನು ಚೀಸ್ ಮಿಶ್ರಣಕ್ಕೆ ನಿಧಾನವಾಗಿ ಸೇರಿಸಿ (ಫೋಲ್ಡ್ ಮಾಡಿ). ಕ್ರೀಮ್ನ ಗಾಳಿ ಹೊರಹೋಗದಂತೆ ಎಚ್ಚರ ವಹಿಸಿ.
3. ಕಪ್ಗಳಲ್ಲಿ ಜೋಡಿಸುವುದು (Layering)
ಈಗ ಸುಂದರವಾದ ಟ್ರಾನ್ಸ್ಪರೆಂಟ್ ಗ್ಲಾಸ್ಗಳನ್ನು ತೆಗೆದುಕೊಳ್ಳಿ.
- ಮೊದಲ ಪದರ: ಬಿಸ್ಕೆಟ್ ಅಥವಾ ಕೇಕ್ ತುಂಡನ್ನು ಹಾಲಿನಲ್ಲಿ ಅದ್ದಿ ಕಪ್ನ ತಳಕ್ಕೆ ಇಡಿ.
- ಎರಡನೇ ಪದರ: ಇದರ ಮೇಲೆ ಒಂದು ಲೇಯರ್ ಸಿದ್ಧಪಡಿಸಿದ ಕ್ರೀಮ್ ಹಾಕಿ.
- ಮೂರನೇ ಪದರ: ಇದರ ಮೇಲೆ ಸಕ್ಕರೆಯಲ್ಲಿ ನೆನೆಸಿದ ಸ್ಟ್ರಾಬೆರಿ ತುಂಡುಗಳನ್ನು ಹಾಕಿ. ಗ್ಲಾಸ್ನ ಹೊರಗಿನಿಂದ ಕಾಣುವಂತೆ ಸ್ಟ್ರಾಬೆರಿಗಳನ್ನು ಜೋಡಿಸಿದರೆ ಫೋಟೋಗೆ ತುಂಬಾ ಚೆನ್ನಾಗಿ ಕಾಣುತ್ತದೆ.
- ನಾಲ್ಕನೇ ಪದರ: ಮತ್ತೆ ಕ್ರೀಮ್ ಹಾಕಿ ಮೇಲ್ಭಾಗವನ್ನು ಸಮ ಮಾಡಿ.
4. ಅಲಂಕಾರ ಮತ್ತು ಸರ್ವಿಂಗ್
ಮೇಲ್ಭಾಗಕ್ಕೆ ಸ್ವಲ್ಪ ಕೊಕೊ ಪುಡಿಯನ್ನು ಜರಡಿಯಿಂದ ಉದುರಿಸಿ. ಮೇಲೆ ಒಂದು ಇಡೀ ಸ್ಟ್ರಾಬೆರಿಯನ್ನು ಕತ್ತರಿಸಿ ಅಲಂಕರಿಸಿ. ಇದನ್ನು ಕನಿಷ್ಠ 4 ಗಂಟೆಗಳ ಕಾಲ ಫ್ರಿಜ್ನಲ್ಲಿ ಇಟ್ಟು ನಂತರ ತಣ್ಣಗೆ ಸರ್ವ್ ಮಾಡಿ.
ಬ್ಲಾಗ್ಗಾಗಿ ಕೆಲವು ವಿಶೇಷ ಟಿಪ್ಸ್:
- ಫೋಟೋಗ್ರಫಿ: ಗಾಜಿನ ಮೇಜಿನ ಮೇಲೆ ಈ ಕಪ್ಗಳನ್ನು ಇಟ್ಟು, ನೈಸರ್ಗಿಕ ಬೆಳಕಿನಲ್ಲಿ (Natural Light) ಫೋಟೋ ತೆಗೆಯಿರಿ. ಗ್ಲಾಸ್ ಸರ್ಫೇಸ್ ಮತ್ತು ಸ್ಟ್ರಾಬೆರಿಯ ಕೆಂಪು ಬಣ್ಣದ ಕಾಂಬಿನೇಷನ್ ಬ್ಲಾಗ್ನಲ್ಲಿ ತುಂಬಾ ಆಕರ್ಷಕವಾಗಿ ಕಾಣುತ್ತದೆ.
- ಪರ್ಯಾಯ: ಮಸ್ಕಾರ್ಪೋನ್ ಚೀಸ್ ಸಿಗದಿದ್ದರೆ, ನೀವು ಹಂಗು ಕರ್ಡ್ (Hunga Curd) ಅಥವಾ ಮನೆಯಲ್ಲೇ ಮಾಡಿದ ಕ್ರೀಮ್ ಚೀಸ್ ಬಳಸಬಹುದು ಎಂದು ನಿಮ್ಮ ಓದುಗರಿಗೆ ತಿಳಿಸಿ.
ಈ ಸ್ಟ್ರಾಬೆರಿ ಲೇಯರ್ಡ್ ಟಿರಾಮಿಸು ಕೇವಲ ಒಂದು ಸಿಹಿ ತಿಂಡಿಯಲ್ಲ, ಇದು ನೋಡಲು ಒಂದು ಸುಂದರ ಕಲೆಯಂತೆ ಕಾಣುತ್ತದೆ. ಅತಿ ಕಡಿಮೆ ಸಮಯದಲ್ಲಿ, ಯಾವುದೇ ಹೆಚ್ಚಿನ ಶ್ರಮವಿಲ್ಲದೆ ನೀವು ಇದನ್ನು ಮನೆಯಲ್ಲೇ ತಯಾರಿಸಬಹುದು. ನೀವು ಇದನ್ನು ಪ್ರಯತ್ನಿಸಿದರೆ, ನಿಮ್ಮ ಅನುಭವ ಹೇಗಿತ್ತು ಎಂದು ಕೆಳಗಿನ ಕಾಮೆಂಟ್ ಬಾಕ್ಸ್ನಲ್ಲಿ ತಿಳಿಸಲು ಮರೆಯಬೇಡಿ!
ಇದೇ ರೀತಿಯ ಮತ್ತಷ್ಟು ರುಚಿಕರವಾದ ಮತ್ತು ಸುಲಭವಾದ ಡೆಸರ್ಟ್ ರೆಸಿಪಿಗಳಿಗಾಗಿ “My Dessert Kitchen” ಬ್ಲಾಗ್ ಅನ್ನು ಫಾಲೋ ಮಾಡಿ. ಈ ರೆಸಿಪಿ ಇಷ್ಟವಾದಲ್ಲಿ ನಿಮ್ಮ ಸ್ನೇಹಿತರೊಂದಿಗೆ ಶೇರ್ ಮಾಡಿ!
Best Easy Strawberry Layered Tiramisu (Eggless & Delicious)”
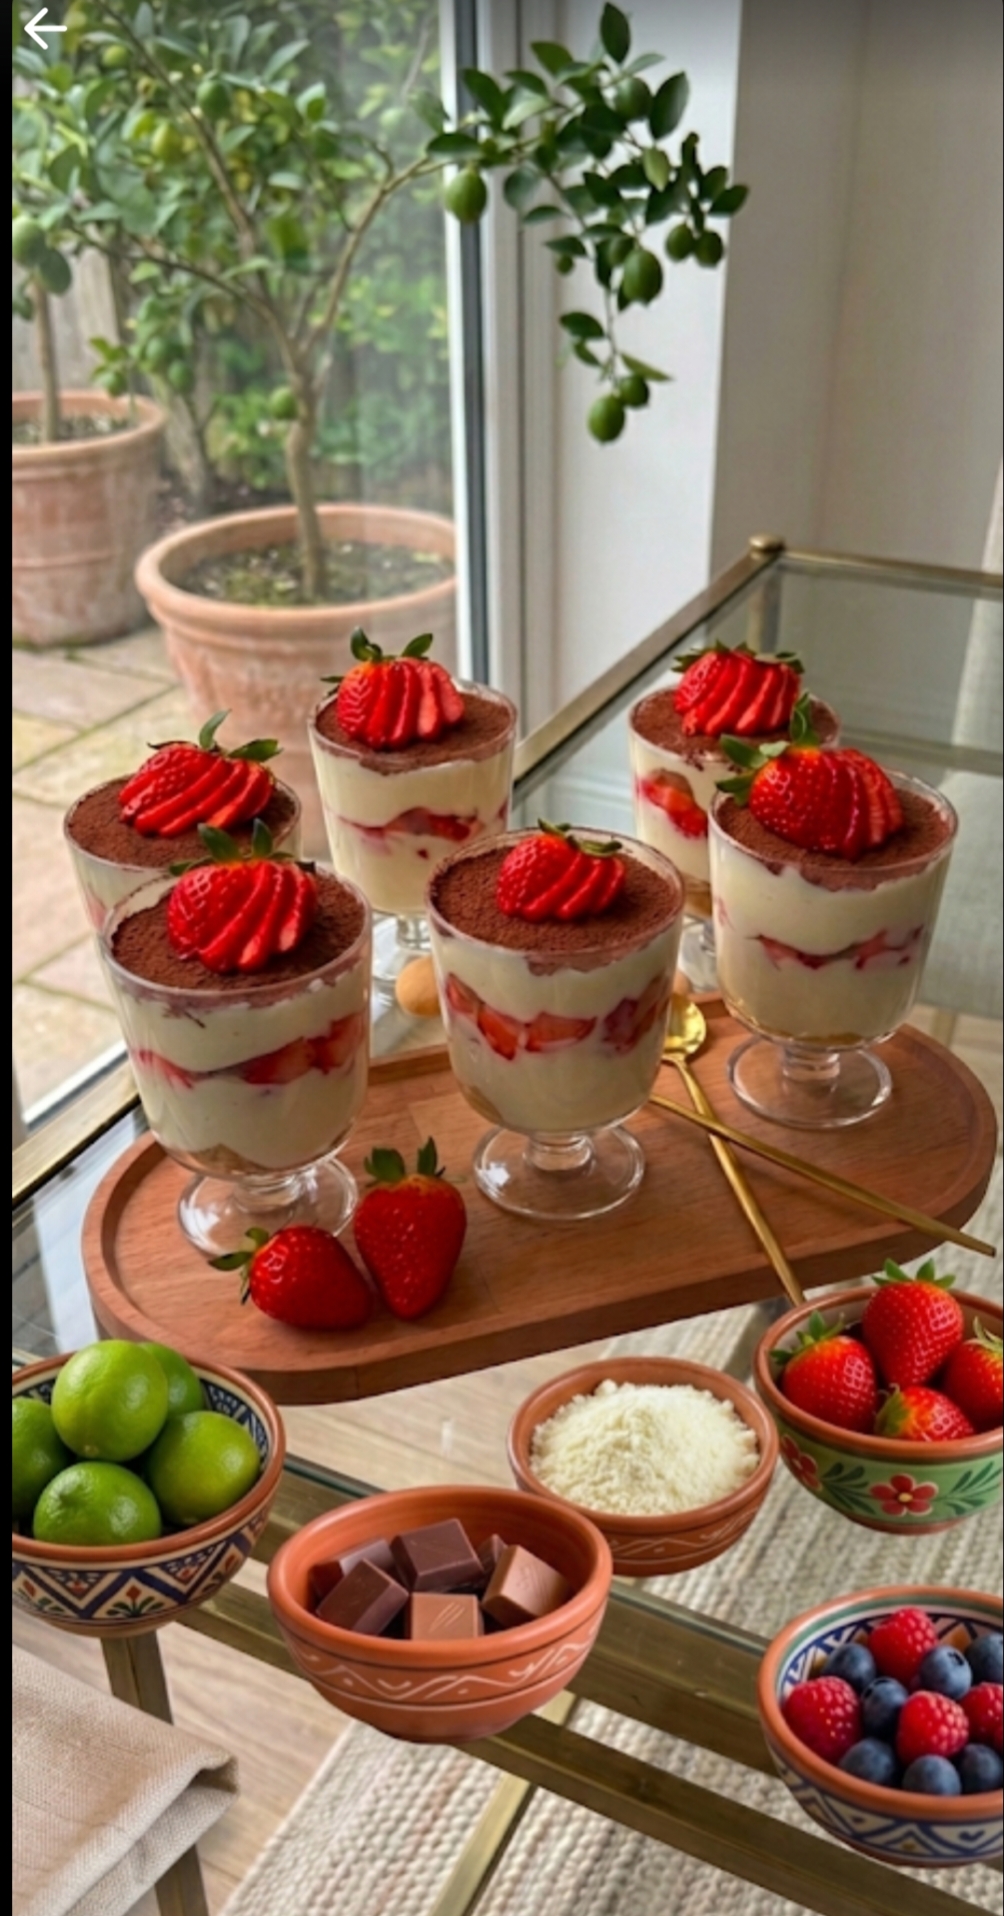
Strawberry Layered Tiramisu
Method
- Prepare strawberries by mixing with sugar and lemon juice.
- Whip the cream and fold it into the mascarpone cheese mixture.
- Dip biscuits in milk and layer them at the bottom of the glass.
- Layer with cream, strawberries, and top with cocoa powder.